How do I configure the Leads functionality in Plan-IT Workshop?
Leads are potential future workshop visits. By foloowing up on leads you increase the chances that they will result in a workshop visit.
Think for example of summer tyres with a low profile depth that you discover during the winter exchange. By creating a lead, Plan-IT will show a reminder that the summer tyres need to be replaced the next time when the customer visits the workshop (work order).
When no workshop visit is scheduled before the lead becomes relevant, Plan-IT will automatically show the lead. You can then actively contact the customer to inform them about the potentiel changing of the tyres before it is time for the summer exchange.
This will generate extra revenue, but also a happy customer. Because you are thinking along with the customer.
Heeft u na het lezen van dit document nog vragen, neem dan contact op met onze helpdesk via info@plan-it.nl.
Activating leads
- In the menubar, click on the option System.
- Select the option System settings.
- In the first row of tabs, go to Connections.
- Then go to Leads in the second row of tabs.
- Put a check in the box Activate leads to turn on the leads functionality.
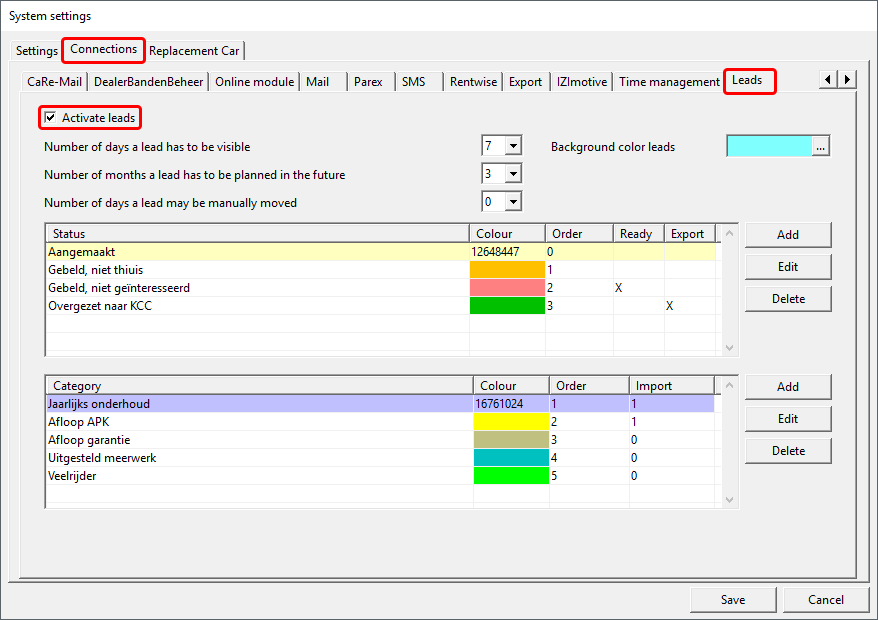
Then there are the following options:
- Number of days a lead has to be visible.
Specify how many days in advance a lead has to appear in the leads sidebar. You then has this many days to handle and process the lead. - Number of months a lead has to be planned in the future.
When you create a new lead, the date will automatically be enter according to this configured number of month from the end date of the work order. - Number of days a lead can be manually moved.
The final date of a lead has been chosen with care. So it is not meant to keep movinga lead once it has been created. With this setting you can limit how much a lead can be moved to another date. - Background color leads.
Select a backgrounfd color for the sidebar in which leads will be shown.
Creating statuses
A lead on the planning board can be given a status. U can fully configure what statuses you want to be using. The status will be shown with a small square on the lead on the planning board:

You can create as many statuses as you want, but make sure that there is at least 1 status that has the option Ready turned on, and 1 that has the option Export turned on:

Ready
Sometimes a lead does not result in a work order when the lead is proecessed. By turning on the option Ready, you can create a status that will make sure that the lead disappears. (The lead will also not be included in the export).
Export
Leads that have expired but don't have the status ready yet (so leads that have not be processed in time) can be exported. After the export, the leads are modified to a status that has the option Export turned on. This ensures that the leads will not be included in the next export.
The Export status will not be visible for users in Plan-IT, leads will be set to this status by Plan-IT.
Creating categories
Categories are similar with main operations for work orders in Plan-IT: these determine the background color of the lead. This way you can divide leads clearly in groups.
You can create as many categories as you like.
Important to mention with the categories is the Import option. Because you can import leads in Plan-IT.
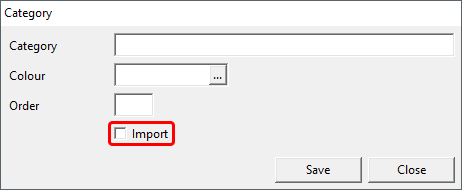
This way you can import a whole series of leads from the marketing department, that need to be processed by the establishment. When the category matches a category in Plan-IT that has the option import turned on while importing, the lead will automatically get the correct color.
Extra functionality is that categories that have the Import option turned on, cannot be modified by users in Plan-IT.
It is not possible for a user either to select a category that has the Import option turned on for manually created leads.
So there is a clear separation between imported leads and manually created leads.
Leads on the planning board
When you turn on the leads option, a new sidebar appears to the right of the planning board where all rlevant leads will be shown.
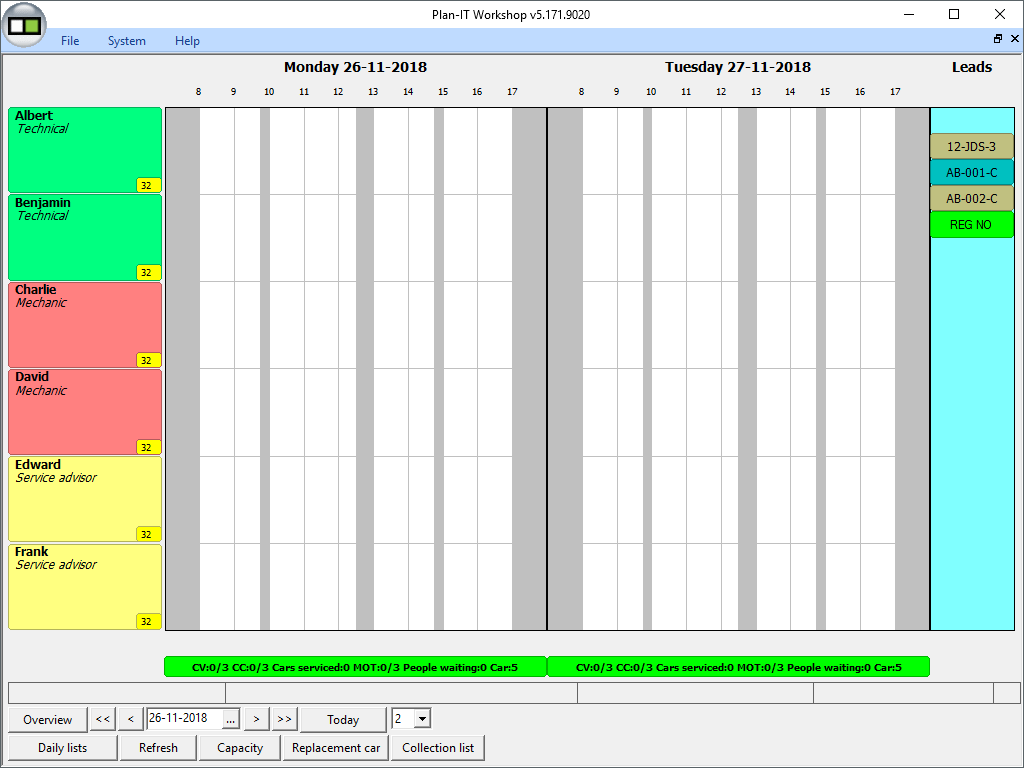
By clicking with the right mouse button on a lead, you can open it and view the details.
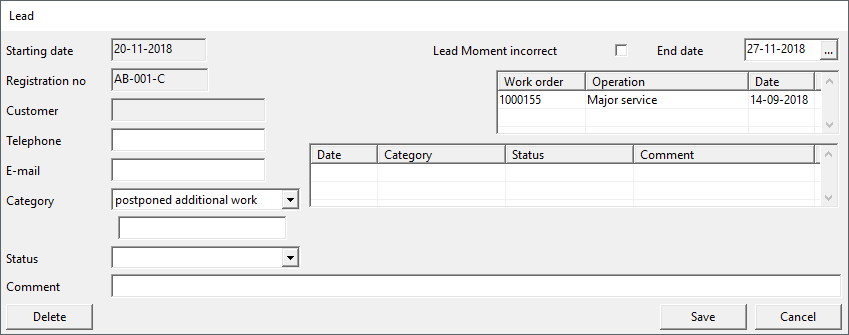
Creating a new lead
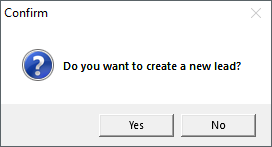
When you set the status of a work order to ready or collected, Plan-IT will check if a lead exists for the registration number in the work order. When this is not the case, a pop-up window will appear asking whether you want to create a new lead.
When you have informed the customer that the profile of the tyres is just enough to pass the MOT test for example, but that these have to be replaced soon, you can create a lead for this (a reminder so that this will not be forgotten during the next visit, or when the visit does not happen you can contact the customer to make an appointment to have the tyres replaced). In the top right corner of the lead window, you can change the End date to the date to when you expect that the customer needs to return to have the tyres replaced. When this lead becomes relevant, it will become visible in the sidebar to the right next to the planning board.
Another way to create leads is to import them.
Import leads
Its also possible to import leads in Plan-IT (for example by the marketing department). Think of situations such as MOT tests, tyre changes, or regular maintenance. You can import leads to your establishment that have to be processed within a certain period.
When scheduling appointments, Plan-IT will automatically check if a lead if present for the registration number and report this as well. This way only the leads remain for which no appointment is created yet. These can then be contacted by the reseption. Ultimately these leads will result in a work order or the customer not being interested instead.
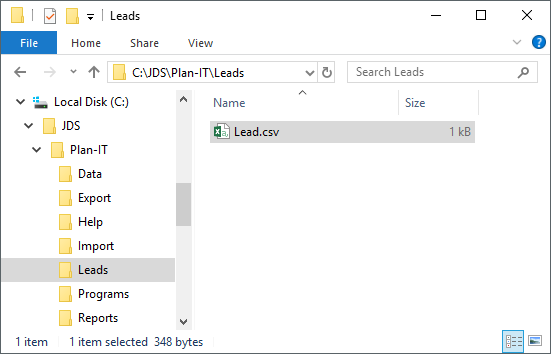
To be able to import leads in Plan-IT, create a Leads folder inside the JDSPlan-IT folder. Then create a file with the name Lead.csv inside this new folder:
The file must be filled as such:

Give the file the following fields, separated by a ; semicolon:
Kenteken
Uiterste Opvolgdatum
Plan-IT vestigingsnummer
Achternaam
Telefoonnummer
Project (Categorie)
Opmerking
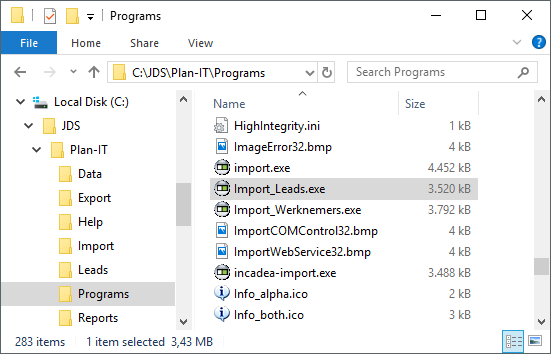
You can then perform the import by going to the folder JDSPlan-ITPrograms and double clicking on the file Import_Leads.exe. All leads in the file Lead.csv will be imported in Plan-IT.
Export expired leads
Leads that are not followed up before the final date is expired disappear from the sidebar next to the planning board window. Another department, for example your customer contact center, will then still have to process the leads. To be able to do this, you can easily export all expired leads.
To do this, start the program Export_Leads.exe that is located in the JDSPlan-ITPrograms folder:
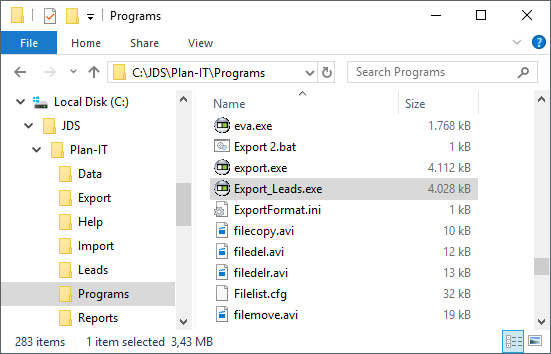
When you run this program, Plan-IT generates the file Leadsexport.csv in the JDSPlan-ITLeads folder, and Plan-IT changes the status of all exported leads to the status exported. This prevents the leads from being included in another export, the next time when you run the Export_Leads.exe program again.
It's up to the organisation to follow up on the exported leads. The file Leadsexport.csv has a specific layout and can easily be opened in Microsoft Excel for example.
The file has to be deleted after it is handled by the organization. When you don't delete the file and run another export, Plan-IT generates a second file with the export date added to the filename (to make sure that no leads will be overwritten when you accidently run the Export_Leads.exe program twice).
Delete leads
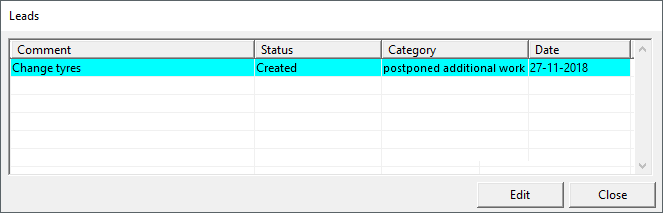
When you create a new work order, Plan-IT checks if there is already a lead for the registration number in the work order. The user automatically gets an overview of all leads for this registration number.
Here you can delete the leads that are no longer relevant with the ceration of the new work order. You will leave the leads that are not handled with creating the new work order (or you inform the custoimer about it and try to have the lead included in the work order). By selecting a lead and clicking on the Edit button, you can delete a lead.
Print leads
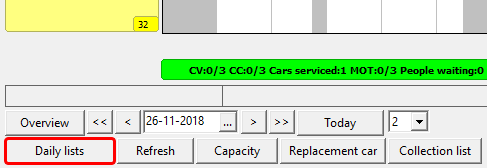
In the sidebar to the right of the planning board, all upcoming leads are clearly visible. Still, some users prefer to print leads on paper (to be able to make notes). With the Daily lists button that is located in the bottom left of the screen, you can print upcoming leads in a list.