FAQ
How can we help you?
When a customer indicates that they are using a lease vehicle, Plan-IT Online can display different types of services and options for replacement transport.
These settings can be applied per branch or for the entire company.
Activating the lease option
To make use of the functionalities for lease drivers, this option must be activated.
Since the lease question is asked on the page where the customer enters the vehicle registration number, it is configured in the Default branch.
(The Global settings define which branch is the Default. If no branch is specified, the first branch will be used.)
Note: If the online planner is directly linked to a specific branch, then the settings of that branch are always used.
In the main menu, go to Lease → Settings
.png)
Set the option No lease question to No.
This question can also be made mandatory. To do so, also set Lease question mandatory to Yes..png)
The customer is then required to indicate whether the vehicle is a lease vehicle.
.png)
Configuring lease-specific services
Create or select a service that should be shown or hidden for lease customers.
In the main menu, go to Services → Overview to edit an existing service or create a new one via New, and configure it as desired.
At the bottom, under Lease, specify whether the service should be shown for lease drivers.
.png)
There are five options:
-
No choice
The service is always shown, regardless of whether the customer indicated that it’s a lease vehicle (default option). -
Business lease
The service is only shown if the customer selected Business lease. -
Private lease
The service is only shown if the customer selected Private lease. -
All lease
The service is shown if the customer selected either Business or Private lease. -
No lease
The service is only shown if the customer indicated that it is not a lease vehicle.
Replacement transport for lease drivers
Replacement transport options can also be shown or hidden for lease drivers.
In the main menu, go to Replacement Transport → Overview to edit an existing option or create a new one via New, and configure it as needed.
At the bottom, under Lease, specify whether the transport option should be shown for lease drivers.
.png)
There are five options:
-
No choice
The transport option is always shown, regardless of whether the customer indicated that it’s a lease vehicle. -
Business lease
The transport is only shown if the customer selected Business lease. -
Private lease
The transport is only shown if the customer selected Private lease. -
All lease
The transport is shown if the customer selected either Business or Private lease. -
No lease
The transport is only shown if the customer indicated that it is not a lease vehicle.
The online planner asks the customer a number of questions to make a workshop reservation. Many of these options can be completely customised. However, there may be one question that is missing. Then you can create your own option. This can be created to your exact requirements.
For example, where would the customer like to leave their car keys?

Create an option
Select Options → Settings

- Set Enable options to Yes
- Under Title, enter the question the customer will see
- Select whether the question is required for the customer to answer
If the option is mandatory, the customer will see an asterisk after the title. - Default Option, select the pre-populated answer if required
- Save the changes

Answers
From the main menu, select Options → New

- Order, change the location of the answer. Indicate the order with a number. If answers have the same number, they will be sorted alphabetically.
- Description, enter the answer the customer will be able to select
- If you want this answer to be visible only to a specific brand, select the MakeID
- Tick the Visible box
- Fill in the other fields if necessary:
- If you want the answer to be available in all establishments, select the Global box.
- Select the Not visible when waiting option to hide the answer if a customer has indicated they want to wait.
- The Code and Label fields can be used by a website builder to add additional logic to the options.
- Save the answer. You will then see an overview of all the answers you have created.

Repeat the steps to create the other choices.
To work paperlessly, Plan-IT Workshop allows the replacement vehicle agreement to be digitally signed and sent via email.
Since version 7.191.4266 of Plan-IT Workshop, the replacement vehicle agreement can be digitally signed using Scrive.
Enabling the Scrive Integration
- Go to System → System Settings → Integrations → Scrive in Plan-IT Workshop.
- Select the option to enable Scrive.
- Enter the Scrive login credentials.
- Save the changes.

Then, go back to System Settings and choose Replacement Vehicle → Checkboxes.
- Select the export path where the agreement will be saved.

- In the Settings tab, ensure that the "Replacement vehicle document choice" is set to "Agreement 3". This agreement will automatically populate the mileage, date, and time.
- Save the changes.

In Practice
-
Create a work order with a replacement vehicle. Ensure the customer's email address is entered.

-
When the customer picks up the vehicle, go to the Replacement Vehicle section.
-
Right-click on the vehicle reservation and select Vehicle in use.

Enter the mileage, fuel level, and any damage details.

-
Right-click on the reservation again and choose Reservation.
-
Check the details and select Signature.

Verify the customer’s name and email address.
- If they are correct, click the Upload PDF to Scrive button to send the agreement to Scrive.
- The DocumentID and PIN will be automatically filled if the agreement has been correctly received by Scrive.

Open the Scrive website or app to have the customer sign.

Once the customer has provided a valid signature, Scrive will send the signed agreement with the verification document to both the customer and the workshop. In Plan-IT Workshop, you can use the Document Signed? button to check if a valid signature has been applied.
 |
 |
| The customer has provided a valid signature | The customer has not provided or has given an invalid signature |
When the replacement vehicle is returned, the agreement can be re-signed in the same way.
Plan-IT Online has a setting that allows customers the option to cancel an appointment made online. This helps prevent no-shows, ensuring that unnecessary gaps in the schedule are avoided.
Enabling Appointment Cancellation
- Go to https://www.plan-it-online.com and log in.
- Select the desired location from the top left.
- In the main menu, select Settings.
- Set the Cancel Appointment option to Yes.

- Save the changes
- The new option Minimum time for cancellation will appear. Here, you can specify the number of working days that must be between the appointment and the cancellation.
In Practice
When the customer books an online appointment, a confirmation email is sent, which includes a link that allows the customer to cancel the appointment.

When the customer clicks this link, Plan-IT Online checks whether the appointment can still be cancelled.
If the appointment can be cancelled, the customer will see the following message:

The workshop will receive a Cancelled Appointment email containing the work details and customer information. Any reservation or work order on the schedule in Plan-IT Workshop will need to be manually removed.
If the appointment can no longer be cancelled, the customer will see the following message:

Custom Cancellation Page
Instead of the standard cancellation page, you can create your own custom page.
- In the main menu, choose Texts/Email → Text Settings.
- Enter your custom page URL in the Cancel Page URL field.

The response parameter indicates whether the appointment cancellation was successful.
| Response | Description |
| ?response=OK | Appointment has been cancelled |
| ?response=The appointment can no longer be cancelled online, please contact your dealer by phone. | Minimum time has elapsed |
| ?response=Appointment not found [{afspraakId}] | Appointment not found |
In order to send e-mail messages (appointment confirmations) to customers from Plan-IT Online, Plan-IT Test Drive Web, and Plan-IT Core, Plan-IT must be added to the SPF record of the mail server. This notifies the mail server that Plan-IT has permission to send emails to customers on behalf of your organization.
To give Plan-IT this permission, add the following to the SPF record: include: spf.plan-it-online.com
For example:
v=spf1 include: spf.plan-it-online.com -all
In Plan-IT Online, we are constantly adding new options to configure the activities:

On this page we provide an explanation of the many options that can be configured in Plan-IT Online for the activities, and what effect these settings have.
Description
This is the name of the activity.
Order
To the left of the description is the field Order. A number can be entered here. The activities are sorted according to this order.
When multiple activities have the same number, these activities are sorted in alphabetical order.
It is also possible to enter a negative number. To put an activity above the first activity with order 1, you can enter 0, or even, for example, -3.
Visible
Below the description are a number of check marks. The first option is Visible. This option must be checked on to make the activity visible in the workshop planner. When this option is unchecked, the activity is not shown to customers.
With this, an activity can be temporarily removed from the workshop planner, for example, without it having to delete it. This activity can then be quickly checked again later to add it back to the list of activities.
Waits
Put a check in the Waits checkbox to mark an activity as a wait option. This option is only available for checkbox activities. We advise you to create 1 activity with the name, for example, "I would like to keep waiting" where this option is checked.
This choice is then shown in the workshop planner under the list of activities. When a customer activates this option, the normal preferred times are not shown, but a separate set of waiting times. The maximum number of waiters allowed at the same time can also be configured, so that the number of customers in the waiting area remains limited. In addition, an option can also be used to indicate that for customers who choose to wait, the replacement transport options will be skipped.

No Friday / Saturday
The options No Friday and No Saturday can be checked to ensure that an appointment where these activities are chosen by a customer cannot be scheduled on a Friday or Saturday. The workshop planner will then automatically show all Fridays or Saturdays as full, even if there would still be availability on those days.
Global
By checking the Global option, an activity is not only shown in the establishment where the activity was created, but also in all other establishments.
This is especially useful if you want to offer the same activities in all establishments. You then only have to keep track of the activities in 1 establishment. If something has to be changed in the activity, then it only has to be done in 1 establishment.
Remark
Check this option to give customers the opportunity to enter a comment on this activity. When a customer selects this activity, a comment box is shown below the activity. For example, a customer can provide some additional explanation in this.
|
With remark not checked:
|
With remark checked on:
|


Group / Extra groups
In the Group field, a specialization can be selected for the activity. Plan-IT Online then only looks for the availability of the appointment at the technicians in Plan-IT Workshop to which this set group is also linked. This ensures that appointments with work that can only be performed by a limited number of technicians are only scheduled with those technicians.
The field Extra groups can be used to link more than 1 group to an activity.
Number of units
Enter here how much time must be reserved for this activity in Plan-IT Workshop. The duration of a unit is determined by the size of the blocks in the mechanic's calendar in Plan-IT Workshop.
See here for more information on unit size.
Visible from / until
Set a date range here if desired. The activity is then only shown when the current day falls within the set date range. Otherwise, the activity will be hidden. It is possible to leave the year empty, then the activity will return every year in the same period, for example for the summer check. It is also possible to leave the start date or end date empty, so this activity is displayed indefinitely from the entered start date or until the entered end date.
This can be used, for example, to make seasonal work automatically appear and disappear.

Plannable from / until
A date range can be set here as well if desired. With this, you indicate when this activity can be planned. Days outside of this date range are automatically shown as unavailable, regardless of actual availability on those days.

Mileage from / until
Enter a Mileage from and Mileage until. Plan-IT Online will then only show the activity when the mileage that a customer enters in step 1 in the workshop planner falls within the mileage range set here. Otherwise, the activity will be hidden automatically.
If 0 is entered as mileage, it will not be used for filtering. It is possible to only enter a Mileage from or Mileage until.

Car age in years from / until
If desired, a minimum and maximum age of a car can be entered here. This activity will then only be shown if the customer's car falls within the range entered here.
You can also enter only a minimum age or only a maximum age of the car.
The age of the car is calculated on the basis of the year of manufacture of the car, which Plan-IT Online receives from RDW, after the customer has entered the registration number.

Price (from)
A Price for the activity can be entered here. The entered price is then shown behind the activity. Check the option From to show the price as a starting price.
|
With a price entered:
|
With the option From checked on as well:
|


Discount price (From)
In addition to a price, a discount price can also be entered here if desired. The original price is then crossed out with the discount price next to it. Again, the option From can be checked.
|
With a discount price entered:
|
With the option From checked on as well:
|


Code / Label
In the field Code an attribute can be entered that an API builder can use to link actions to this activity. The code must be unique, so the same code cannot be used for two different activities.
In the field Label an attribute can be entered that can be used from the API to link actions to a group of activities with the same label. The same label can therefore be used for several activities.
Duration
In the Duration field you can enter how much time the activity will take, in minutes. This length of time is used to inform web builders via the API how much time should be reserved for this activity.
ExtraInfo
In the ExtraInfo field, an additional explanation for the activity can be entered. An icon with a i will then be shown next to the activity. When a customer moves the mouse over this, the text entered here appears in a pop-up window.

Day unavailable
Set here how many working days should be closed by default for an appointment in which this activity is selected. When choosing a date, the planner will then show the number of working days set here as Full, regardless of whether there is still availability.
Make
A make can be selected here. The activity will then only be shown if the brand of the car whose registration number the customer has entered corresponds with the brand set here. When the customer has entered the registration number of a different make of car, this activity is hidden.
Category
Here you can choose a category for checkbox activities. Activities with the same set categories are displayed together in a submenu.
API builders can also use the CategoryId to categorize certain activities.
|
With a category closed:
|
With a category opened:
|


Last plan time
A last scheduling time can be set here. When a customer selects this activity, when choosing a time for the appointment, no later time than this configured schedule time can be chosen, regardless of whether there is still availability after this time.
Fuel type
If desired, select a fuel type here. The activity is then only shown if the car, whose registration number has been entered by the customer, has this fuel type. Otherwise, the activity will not be displayed. If nothing is selected here, this will not be filtered.
Type
A specific car model can be entered here. The effectiveness is then only shown if the model of the car, whose registration number has been entered by the customer, meets this requirement. Multiple models can be specified, separated with a semicolon.
Maximum count per day
If desired, a maximum number of appointments per day can be entered here. When this maximum count is reached for a certain day, that day will be shown as full for customers who select this activity, regardless of the availability for that day.
This only applies to the online appointments where activities with a maximum number per day have been selected. Appointments made outside the online workshop planner are not included in this.
Please contact Plan-IT so that we can adjust your license, so that the new version can be downloaded.
Because this new version has an entire new runtime, it is important that you first read this new update procedure completely before you start the update. That's why we've put this update behind a license.
- All users need to close Plan-IT Workshop.
- All tasks linked to Plan-IT Workshop must be stopped (Wincar link, Autoline link, Maintenace.exe, etc.)
- Make a copy of the entire Plan-IT Workshop folder
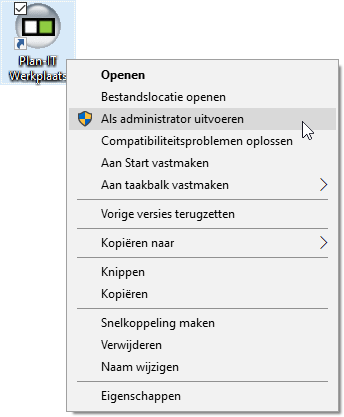
(as a backup for when something goes wrong, but also as an extra check to see if anyone still has Plan-IT Workshop open. You cannot make a copy if there are still users in Plan-IT Workshop) - Log in on the server where Plan-IT Werkplaats is installed (not via the network). Right click on the Plan-IT Workshop shortcut (or on the planbord.exe in the Plan-ITPrograms folder) and select the option Run as administrator
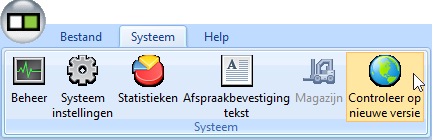
- Log in with a user account with Master rights, then click on System in the menu bar and select the option Check for new version.
- Download the new version. This may take a while as it is a major update, please be patient and do not close the update.
- When the download is complete, the update window will confirm that the update has been installed correctly.
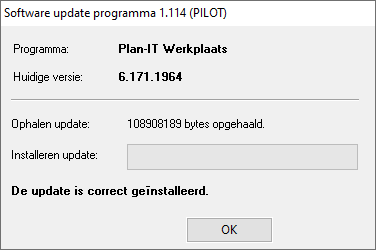
- Wait another 10 seconds and then click the OK button. Plan-IT Workshop will now start a script, which will unpack the new runtime and clean up the old runtime. So let this complete.

- When that is also completed, and the window has closed itself, Plan-IT Workshop has to be started again as administrator. Plan-IT Workshop will now perform the database update.
- When that is done, the login window will appear and the update itself is ready. Now check if everything is working properly.
- Then you have to start 1 time as administrator on each Terminal Server or Workstation Plan-IT Workshop
(Plan-IT is temporarily granted the rights to install the new dll's on the workstations where it is used. If you work with Terminal Servers, this must be done once on every TS where Plan-IT Workshop is being used.) - If you have tasks running somewhere for e.g. the Autoline connection (firedeamon services) then Plan-IT Workshop must also be started as administrator on this server.
- You can then start the tasks again.
The update is now successfully completed.
Follow the below steps to give a partner access to your Plan-IT data:
- Go to https://www.plan-it-online.nl and log in with your credentials.
- In the menu to the left side, click on the option API-inloggegevens, and select the option Website API of CRM API

Select Website API to give the partner access to the functionalities of Plan-IT Online to create a custom planner/lay-out.
Select CRM API to make Plan-IT Workshop data available to the partner.
- In the right part of the window, in the field Partner, select the preferred partner that you want to give access to your data.
- In the field Description, you can enter something for yourself, to help recognize this partner.
- When everything is entered as preferred, click on the Save button.

The partner is added, and a username and password are generated.
Provide this data to the partner.
When you no longer wish the partner to have access to the Plan-IT Online data, because the collaboration has ended for example, then place a checkmark in the box with the option Inactive.

Besides a whole range of import formats of DMSes, Plan-IT Workshop also has a default import format. When you make sure that your file meets its conditions, you can import your customers and registration numbers in Plan-IT.
Below is a description of the conditions that the file should have and how this works:
- The import file must be named Plan-IT.csv and must have fields separated by a ; (semicolon).

All the fields must be present in the format and in this exact order:
Kenteken (registration number
Autotype (car type)
DMS ID (customer number)
Titel (title)
Naam (name)
Straat (street)
Huisnummer (house number)
Postcode (postal code)
Stad (city)
Telefoon (phone number, preferrably mobile)
E-Mail (e-mail address)
- The file must be located in the Plan-ITImport folder. When this folder does not yet exist, you can create it.

- Then go to the Plan-ITPrograms folder and run the program Import.exe.

- In the menubar, click on the option Systeem and select the option Import.

The import will now run and your customer and registration number date will be imported in Plan-IT. You can do this as many times as you want. So if you regularly update the file with new customers and changes, they will be processed in Plan-IT with the next import.
It is possible in Plan-IT to export the most important data. Think of work order information, free days, calendar data, replacement car appointments, and occupation data.
This can be done with the export.exe program:
- Open a Windows Explorer window (Windows key
 + E).
+ E). - Navigate to the Plan-IT Programs folder.
- Double click on the export.exe file to start the program.

You can pass parameters to this Export.exe file:
Parameter 1: starting month
Parameter 2: end month
Parameter 3: year
Parameter 4: export occupation or other data (1 = Occupation, 0 = Other data, 2 = Capacity percentage, 3 = More and less time, 4 = Replacement car workorders, 5 = Clipboard )
The minimal export is 1 month.
When you want to export March 2018 for instance, create a shortcut to the export.exe like this:
export.exe 3 3 2018 0

When you double click the shortcut, several XML files are generated (KALENDER.XML, VERVANGENDVERVOER.XML, VRIJEDAGEN.XML, WERKORDERS.XML).
These XML files are placed in the Plan-IT Data folder.

When you want to export the occupation of January to June 2017, configure the export.exe shortcut like this:
export.exe 1 6 2017 1

The file BEZETTING.XML is placed in the Plan-IT Data directory.

Leads are potential future workshop visits. By foloowing up on leads you increase the chances that they will result in a workshop visit.
Think for example of summer tyres with a low profile depth that you discover during the winter exchange. By creating a lead, Plan-IT will show a reminder that the summer tyres need to be replaced the next time when the customer visits the workshop (work order).
When no workshop visit is scheduled before the lead becomes relevant, Plan-IT will automatically show the lead. You can then actively contact the customer to inform them about the potentiel changing of the tyres before it is time for the summer exchange.
This will generate extra revenue, but also a happy customer. Because you are thinking along with the customer.
Activating leads
- In the menubar, click on the option System.
- Select the option System settings.
- In the first row of tabs, go to Connections.
- Then go to Leads in the second row of tabs.
- Put a check in the box Activate leads to turn on the leads functionality.
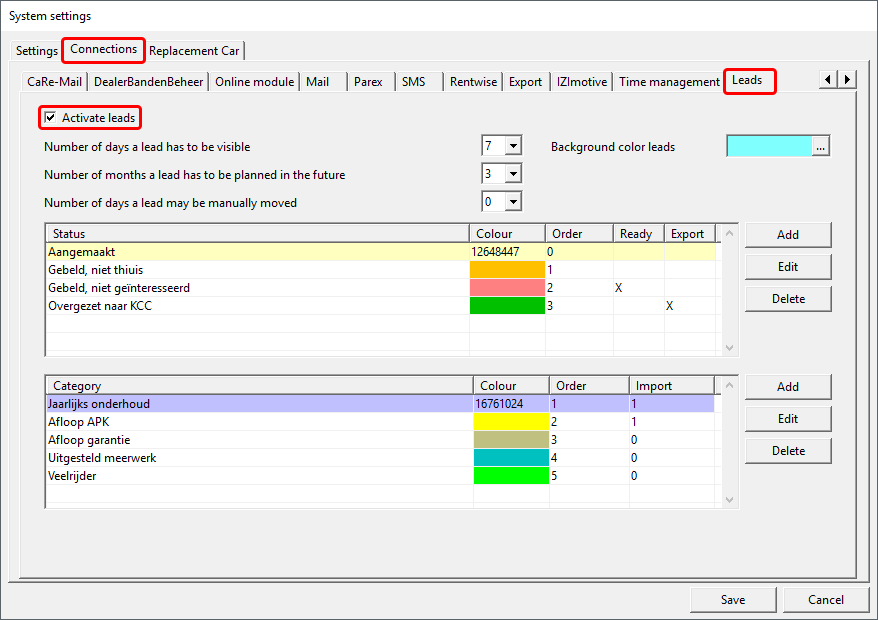
Then there are the following options:
- Number of days a lead has to be visible.
Specify how many days in advance a lead has to appear in the leads sidebar. You then has this many days to handle and process the lead. - Number of months a lead has to be planned in the future.
When you create a new lead, the date will automatically be enter according to this configured number of month from the end date of the work order. - Number of days a lead can be manually moved.
The final date of a lead has been chosen with care. So it is not meant to keep movinga lead once it has been created. With this setting you can limit how much a lead can be moved to another date. - Background color leads.
Select a backgrounfd color for the sidebar in which leads will be shown.
Creating statuses
A lead on the planning board can be given a status. U can fully configure what statuses you want to be using. The status will be shown with a small square on the lead on the planning board:

You can create as many statuses as you want, but make sure that there is at least 1 status that has the option Ready turned on, and 1 that has the option Export turned on:

Ready
Sometimes a lead does not result in a work order when the lead is proecessed. By turning on the option Ready, you can create a status that will make sure that the lead disappears. (The lead will also not be included in the export).
Export
Leads that have expired but don't have the status ready yet (so leads that have not be processed in time) can be exported. After the export, the leads are modified to a status that has the option Export turned on. This ensures that the leads will not be included in the next export.
The Export status will not be visible for users in Plan-IT, leads will be set to this status by Plan-IT.
Creating categories
Categories are similar with main operations for work orders in Plan-IT: these determine the background color of the lead. This way you can divide leads clearly in groups.
You can create as many categories as you like.
Important to mention with the categories is the Import option. Because you can import leads in Plan-IT.
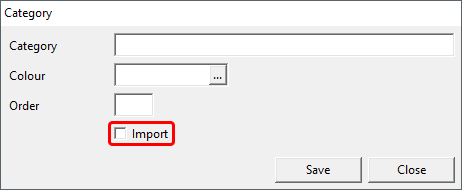
This way you can import a whole series of leads from the marketing department, that need to be processed by the establishment. When the category matches a category in Plan-IT that has the option import turned on while importing, the lead will automatically get the correct color.
Extra functionality is that categories that have the Import option turned on, cannot be modified by users in Plan-IT.
It is not possible for a user either to select a category that has the Import option turned on for manually created leads.
So there is a clear separation between imported leads and manually created leads.
Leads on the planning board
When you turn on the leads option, a new sidebar appears to the right of the planning board where all rlevant leads will be shown.
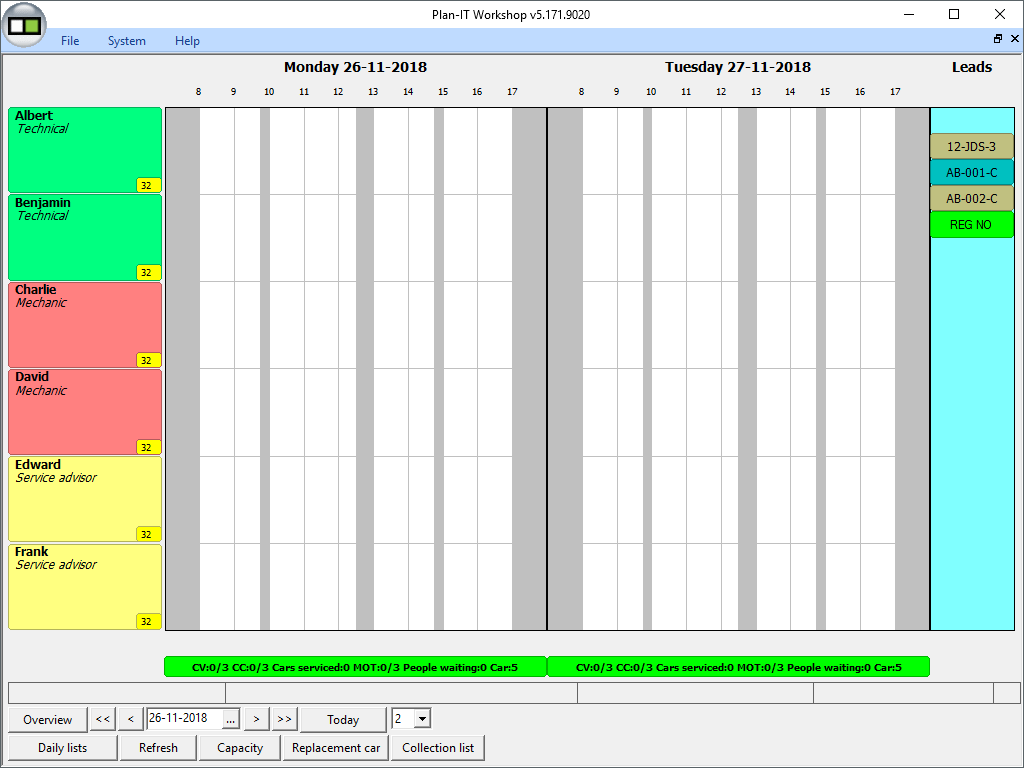
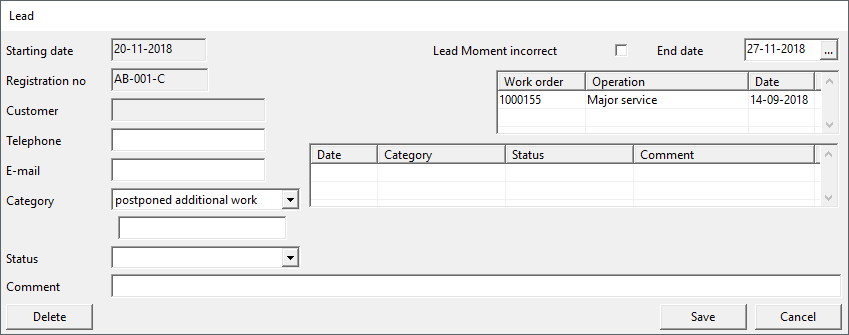
By clicking with the right mouse button on a lead, you can open it and view the details.
Creating a new lead
When you set the status of a work order to ready or collected, Plan-IT will check if a lead exists for the registration number in the work order. When this is not the case, a pop-up window will appear asking whether you want to create a new lead.
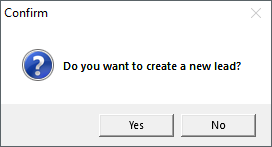
When you have informed the customer that the profile of the tyres is just enough to pass the MOT test for example, but that these have to be replaced soon, you can create a lead for this (a reminder so that this will not be forgotten during the next visit, or when the visit does not happen you can contact the customer to make an appointment to have the tyres replaced). In the top right corner of the lead window, you can change the End date to the date to when you expect that the customer needs to return to have the tyres replaced. When this lead becomes relevant, it will become visible in the sidebar to the right next to the planning board.
Another way to create leads is to import them.
Import leads
Its also possible to import leads in Plan-IT (for example by the marketing department). Think of situations such as MOT tests, tyre changes, or regular maintenance. You can import leads to your establishment that have to be processed within a certain period.
When scheduling appointments, Plan-IT will automatically check if a lead if present for the registration number and report this as well. This way only the leads remain for which no appointment is created yet. These can then be contacted by the reseption. Ultimately these leads will result in a work order or the customer not being interested instead.
To be able to import leads in Plan-IT, create a Leads folder inside the Plan-IT folder. Then create a file with the name Lead.csv inside this new folder:
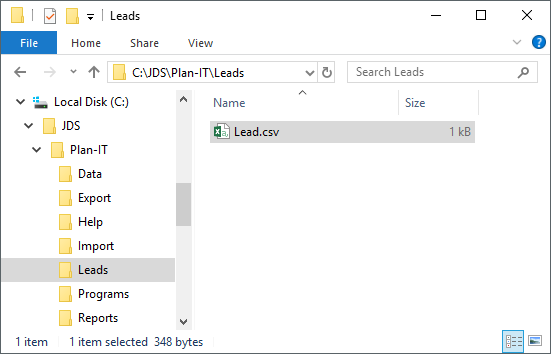
The file must be filled as such:

Give the file the following fields, separated by a ; semicolon:
Kenteken
Uiterste Opvolgdatum
Plan-IT vestigingsnummer
Achternaam
Telefoonnummer
Project (Categorie)
Opmerking
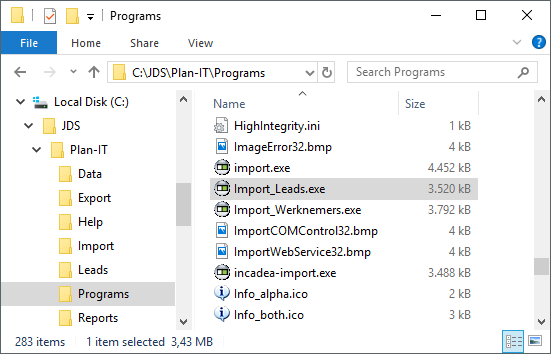
You can then perform the import by going to the folder Plan-ITPrograms and double clicking on the file Import_Leads.exe. All leads in the file Lead.csv will be imported in Plan-IT.
Export expired leads
Leads that are not followed up before the final date is expired disappear from the sidebar next to the planning board window. Another department, for example your customer contact center, will then still have to process the leads. To be able to do this, you can easily export all expired leads.
To do this, start the program Export_Leads.exe that is located in the Plan-ITPrograms folder:
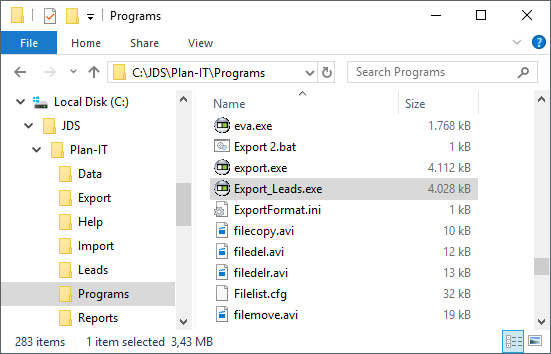
When you run this program, Plan-IT generates the file Leadsexport.csv in the Plan-ITLeads folder, and Plan-IT changes the status of all exported leads to the status exported. This prevents the leads from being included in another export, the next time when you run the Export_Leads.exe program again.
It's up to the organisation to follow up on the exported leads. The file Leadsexport.csv has a specific layout and can easily be opened in Microsoft Excel for example.
The file has to be deleted after it is handled by the organization. When you don't delete the file and run another export, Plan-IT generates a second file with the export date added to the filename (to make sure that no leads will be overwritten when you accidently run the Export_Leads.exe program twice).
Delete leads
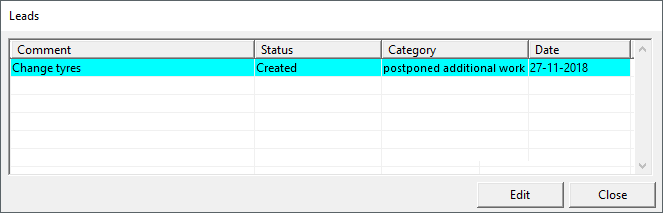
When you create a new work order, Plan-IT checks if there is already a lead for the registration number in the work order. The user automatically gets an overview of all leads for this registration number.
Here you can delete the leads that are no longer relevant with the ceration of the new work order. You will leave the leads that are not handled with creating the new work order (or you inform the custoimer about it and try to have the lead included in the work order). By selecting a lead and clicking on the Edit button, you can delete a lead.
Print leads
In the sidebar to the right of the planning board, all upcoming leads are clearly visible. Still, some users prefer to print leads on paper (to be able to make notes). With the Daily lists button that is located in the bottom left of the screen, you can print upcoming leads in a list.

With VPS (Volvo Personal Service) two mechanics are working on the car at the same time. They perform all repairs and checks together. Because of that, a VPS work order needs to be scheduled on two emplyees in Plan-IT.
Activate VPS
Follow the below steps to activate the VPS functionality:
- Click in the menubar op the option System.
- Select the option System settings.
- Go to the tab Connections.
- Put a check in the box with the option VPS aanzetten (Activate VPS).

Link employees
After that, the employees need to be linked to each other, open the VPS calendar to do that.
- Click on an employee with the right mouse button.
- In the context menu that appears, select the option VPS Calendar.

The VPS Agenda window appears, with the employee selected on which you have clicked with the right mouse button:

Click on a day in the roster of another employee now to link them to the selected employee. A block appears on that day for the other employee and the selected employee.

To select multiple days at the same time, click on a day and keep the left mouse button pressed, and move the mouse to the right.

Release the mouse button when the red bar is over the preferred number of days. The red bar disappears and the employee is linked to the selected employee for those days.

To delete the linked days again, click on the preferred day, keep the left mouse button pressed and move the mouse to the left.

Click on another employee in the left column to select them and to link other employees to them:

It is also possible to link more employees to each other if you prefer that:
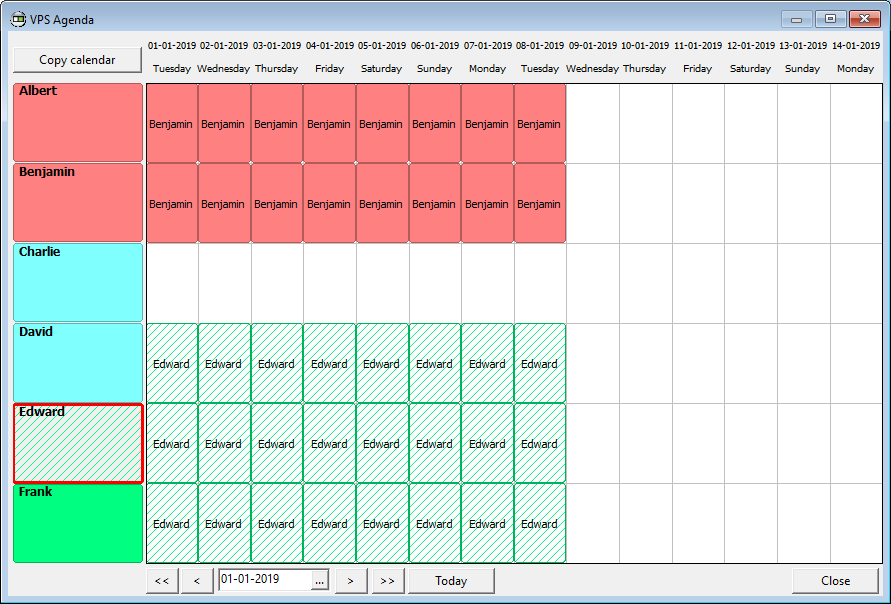
Click on the Close button to close the VPS Agenda window again when all employees are linked to your liking.
When you move the mouse over the planboard now, a label appears next to the mouse cursor to indicate which employees are linked to each other:

The green box behind the name indicates that the linked employee is available on this day and time and that a VPS work order can be scheduled here. When another work order is already scheduled for the linked employee on that time, the box will turn red:

Schedule VPS work order
There is an extra option in work orders now to indicate that the work order is a VPS.
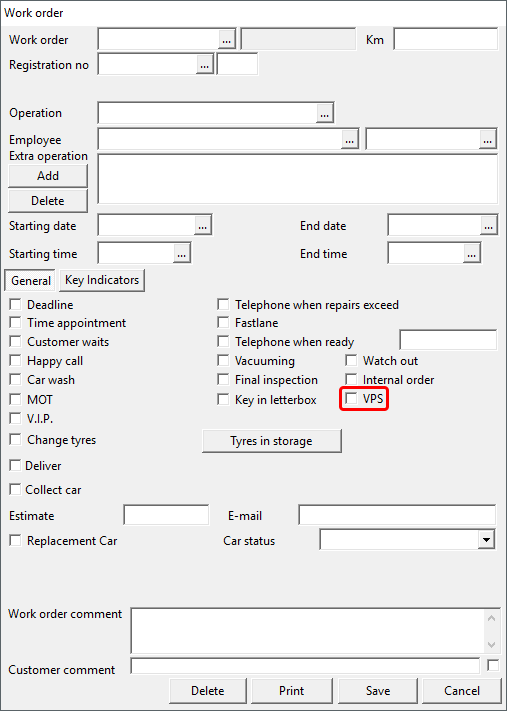
When you import a work order from the DMS and you put a check in the box with the VPS option, the operation time is divided between all linked employees. You can recognize VPS work orders on the planboard by the white bar. In the topleft corner of the VPS work order is also a label with an H for the head employee and an E with the extra employees.

It is also possible to turn off the VPS option at a later time. The work order then takes the original time duration again and disappears for the linked employees.
The system also keeps the VPS option into account when moving work orders. The total operation time remains the same.
The Plan-IT work order has a checkbox with the name Watch out:

When this option is turned on, the work order is displayed shaded:

Change the text of the checkbox
You can edit the text of the checkbox, so that you can use this option for a specific function. The text can be customised freely (do not use too many characters, because the text is trimmed then).
Follow the below steps to edit the text:
- In the menubar, click on the option System.
- Select the option Management.
- Click with the right mouse button on the green Plan-IT bar.
- Go to the tab Checks.
- In the last option Change the text of the 'Watch out' checkbox you can enter your own text for the checkbox:

When you open a work order now, you will see that the text for the Watch out checkbox has been changed:

Keep in mind that this is a global setting. The text will be changed in all establishments.
You need Master rights to be able to change the text.
In the manamegement section you can manage establishments, brands, users, and rights, and connect to DMS systems.
The number of establishments and brands is limited by the license.
Users can be added freely, however the maximum number of users that can log in to Plan-IT simultaneously is limited by the license.
Open management window
To be able to open the management window, you need Master rights in Plan-IT.
- Click in the menubar on the option System.
- Select the option Management.
The management window appears:

The Management window consists of the following parts:
- In the top is the green Plan-IT bar.
- Under that are the several establishments (yellow) and brands (blue).
- Under the black line are all users listed. The color of the users is determined by the rights that they have.
- In the bottom right corner are buttons to go to the User section or to Close the window.
Establishments and brands
Establishments are the locations you are managing. When you want to manage more that 1 location you can keep the planning of different locations separated in Plan-IT by adding multiple establishments. How many establishments you can add depends on your Plan-IT license.
Add establishment
To add an extra establishment, click with the right mouse button on the green Plan-IT bar and select the option Add Establishment.

The Add establishment window appears.

- Enter the name of the establishment that you want to add in the Establishment field.
- In the Cust. database you can select whether you want to use an existing database or your own customer database for the new establishment.
- In the DMS link field, you can select a DMS that you want to use for this establishment. When you select a DMS here, it will overrule the global setting.
- In the fields Import and Export, specify the location where the DMS-system and Plan-IT should place the files for the connection. When you leave the Export field empty, the location of the field Import is used for both.
When everything is configured to your liking, click on the Save button to add the establishment to the system.
When more than 1 establishment is added, users can switch between all establishments they have access to in the bottom of the planboard window.
Edit establishment
To edit an establishment, click in the management window with the right mouse button on an establishment and select the option Edit from the context menu.

The Edit establishment window opens with all entered data.

Edit the preferred data and click on the Save button to apply the changes.
Switch off establishment
It is not possible to delete an establishment, but you can put an establishment Inactive.
To make an establishment inactive, click in the management window with the right mouse button on an establishment and select the option Switch off in the context menu.

In the pop-up window that appears, click on the Yes button to confirm the switching off.

You need to close and restart Plan-IT to apply the changes. The establishment will be shown grey in the management window and cannot be selected anymore in the planboard window.
To switch on the establishment again, click in the management window with the right mouse button on the inactive establishment and select the option Switch on in the context menu.

Add brand
Because brands are always linked to establishments, adding brands is done via establishments. Click in the management window with the right mouse button om the establishment for which you want to add a brand and select the option Add Brand.

Editing and switching off brands works in the same way as editing and switching off establishments.
Users
To add a new user, click with the right mouse button on the green Plan-IT bar and select the option Add user.

The Add user window appears:

- In the Log-in field, enter what you want to name the new user. This is the username that the user will need to enter in the login screen.
- In the Password field, enter the password for the user.
- When everything is filled in to your liking, click on the Save button.
Give users rights
After creating a new user, it is listed in all establishments and brands, but is set by default to Not visible. Give the user rights to have them view data or perform actions in establishments and brands.
There are different rights levels, and only a user with Master rights can change the rights of other users.
In the Management window, click on the establishment or brand where you want to give the new user rights.
A list apears with all users underneath each other. The color and the letter in the bottom right corner of the user box indicate what rights they currently have.
The following rights profiles exist within Plan-IT:
| Not visible: | this user can not login to this establishment. (Color is greyand there is an N in the bottom right corner). |
| View: | this user can log in, but only view data. (Color is orange and there is a B in the bottom right corner). |
| User: | can schedule, edit, and delete work orders. However there are no rights to edit baset settings or system settings. (Color is green and there is a G in the bottom right corner). |
| User +: | has the same rights as a regular user, but there are additional rights that can be enabled in the Systemsettings for this rights level. (Color is light green and there is a G+ in the bottom right corner). |
| Administrator: | has rights to edit/add system settings and base settings but has no access to the Management section. (Color is red and there is an A in the bottom right corner). |
| Master: | has all rights within an establishment and also has access to the Management section. (Color is yellow/green and there is an M in the bottom right corner). |
| Default establishment: | with this option, you can select an establishment which the user will start from when logging in. (The letter D appears in the top left corner). When no default establishment is selected, Plan-IT will start with the first active establishment in which the user has rights. |
To give a user rights in the selected establishment or brand, click with the right mouse button on the user and select the preferred rights level in the context menu. You can assign a different rights level for each establishment or brand for the same user.

Edit or delete user
To edit the details of a user, click on the User button in the bottom right corner of the management window to switch to the user section. Instead of the establishments and brands, you now see the users in the top of the window.
Select a user by clicking on it with the left mouse button. Then click on it with the right mouse button and select the Edit user option to edit the details.

You can also delete a user in the user section by clicking on a user with the right mouse button and select the option Delete user. Click on the Yes button in the pop-up window that appears to confirm deleting the user.

Systemsettings
In the systemsettings you can manage global settings of Plan-IT. These apply to all establishments in Plan-IT.
Click with the right mouse button on the green Plan-IT bar and select the option Systemsettings in the context menu to open the system settings of the management window.

The System window appears:

In the top of this window is the option Hide users at log-in. Activate this option to have users type in their user name instead of selecting it from a list. Having to type in your username is safer than being able to setect it from a list.
Below that you can select a DMS link. Contact us when your DMS is not listed in the dropdown list.
In the fields Import and Export, enter the folders in which the DMS places the XML files. When you leave the Export field empty, the folder in the Import field is also used for the export.
When starting Plan-IT Workshop, once a day an integrity check is performed that checks if all work orders meet all conditions. By putting a check in the box with the Do not perform integrity check at startup option, this automatic check is turned off. The integrity check can then be manually performed with a button in the System settings.
With the Activate logging option, you can indicate if the system should keep a logfile of performed actions, such as creating, editing, and deleting work orders. It can also be found back in the logfile which user has performed the action.
Turn on the Close Plan-IT without question option to be able to close Plan-IT Workshop without showing a confirmation window.
Turn on the High Integrity option on to have Plan-IT perform an extra check when saving and editing work orders before it is written to the database. This helps to prevent indexing issues with certain networks.
To turn on this option, create a Highintegrity.ini file in the JDSPlan-ITPrograms folder with the following lines of text:
[Integrity]
High=On
The Debug mode webservices option is to research errors in webservice calls. With this debug option you can check what Plan-IT is sending and receiving.
Tyre manager
Put a check in the box with the Tyre manager option to turn it on. With the tyre manager function, you can monitor the profile depth of tyres and when summer or winter tyres need to be changed.
You can specify the months when the Summer and Winter season start and end. When scheduling a work order, the system will then give a reminder when it is time to change the tyres.
Put a check in the box with the Register profile option conditions when you want the system to give an indication at which profile depth a tyre should be replaced. You can enter the number of millimetres when a profile is safe or unsafe. This can be entered separately for summer and winter tyres.
Besides that there are several options for the tyre manager that you can turn on or off.
By turning on the Register make tyres option, you can enter the brand of the stored tyres in the tyre manager. This will make it easier to find them back in storage.
Put a check in the box with the Storage location can be entered manually option when you want the option to enter the location manually instead of having to select it from a list.
With the Storage location mandatory option, you can make it mandatory for users to enter a location when entering tyres.
With the Disable OK / NOK check option, you can disable the mandatory entering wether the tyres are OK.
With the options Fill End Storage remark and Fill storage remark, you can make it mandatory for users to enter a remark when storing tyres or taking tyres out of storage. With these options turned off, a remark is optional.
In the Print field, you can indicate in what format the labels and the tyrepass needs to be printed.
Tyrepass
In the tab file Tyrepass, you can enter the conditions that count for customers that use the tyrepass.
Checks
In the Checks tab, you can turn off several options of the Work order window. When you turn on an option in this tab file, that option will not be shown anymore in new and existing work orders.

User +
The tab file User + contains several options with which you can give users with this rights profile extra priviliges. This way you can configure the User + rights profile completely to your liking.

Tgiggers
By configuring triggers, you make sure that when selecting certain operations in work orders, the options Internal order, MOT, or Change tyres are automatically turned on. This way you prevent that users accidently forget to turn on an option. For more information, check the page Triggers.
You can also view the below demonstration video:
Enabling High Integrity in Plan-IT means that when you save and modify work orders, Plan-IT performs an extra check before it writes to the database.
This can help prevent indexing problems with some networks.
When you have the latest version of Plan-IT (from version 5.171.7100) you can enable this option.
- In the menubar, click on the option Systeem
- Select the option Management.
- Click with the right mouse button on the green Plan-IT bar and select the option Systemsettings.
- Put a check in the box with the option High Integrity.

After you have enabled this option, all users have to close and restart Plan-IT for the changes to take effect.
Keep in mind that Plan-IT may become a bit slower because it will perform extra checks on the database.
In Plan-IT you can move work orders by clicking and dragging. When the mouse pointer is on a work order, click with the left mouse button and keep te button pressed. By moving the mouse now, you can drag the work order to another position. Release the left mouse button when the work order is on the preferred position.
However when you release the work order while it is above another work order, Plan_IT will give an error message that the work order cannot be moved:

So you will have to place the work order very precisely behind another work order. To solve this, you can turn on the Snap to grid option. With this option turned on, you don;'t have to place work orders so precisely. Plan-IT will make sure that the work order is put on the correct position automatically.
Turn on Snap to grid
- In the menubar, click on the option System.
- Select the option System settings.
- The first row of tabs opens to Settings.
- Go in the second row of tabs to System.
- Turn on the option Snap to Grid that is licated to the bottom of this window.

When you have turned on this option, and you release a work order on top of another one, Plan-IT will place the work order on the first available time after the work order.
The below video demonstrates how this works:
Having a lot of old data in Plan-IT can impact the performance of Plan-IT. By deleting old work orders, calendars, days off, reservations etc. once in a while with the cleanup option, Plan-it may work faster. Follow the below steps to perform a cleanup:
- Click in the menubar on the option System.
- Select the option System settings.
- Go to the tab System.
- Click in the topright corner of the window where you are now on the button Cleanup.

The Clear data window appears. The top part is for deleting old data.

- Click on the
 button to select the date you want. We advise a date of 6 months ago.
 - Click on the button Cleanup.
The system starts deleting all data older than the specified date. This may take a while, especially when it's the first time that you perform the cleanup. The cleanup process finished when the small windows disappears.

Contact your supplier to activate the RentWise connection in Plan-IT.They will update your licenseand activate the RentWise connection.
Follow below steps to properly configure Plan-IT, to have the information forwarded to RentWise:
Link establishment
First of all you have to link each Plan-IT establishment with the corresponding establishment in RentWise.
- In the menubar click on the option System.
- Select the option Management. The management window appears with an overview of all establishments and brands in Plan-IT.
- Click with the left mouse button on the establishmentthat you want to connect to RentWise to select it.
- Then click with the right mouse button and select the option Edit.

The Edit establishment window appears with the details of the establishment. In the field RentWise Filiaal, enter the establishment of RentWise (contact RentWise when you dont know what your RentWise establishment is). Click on the Save button when you have entered the correct rentWise establishment.

In Plan-IT it is now known which Plan-IT establishment is linked to which RentWise establishment.
Activate RentWise
The next step is indicating that you want to make use of the RentWise connection. You can configure this for each Plan-IT establishment separately.
- Click in the menubar on the option System.
- Select the option System settings.
- In the first row of tabs, go to Connections.
- Then go to RentWise in the second row of tabs.
- Put a check in the box with the option RentWise aanzetten to activate the connection.

- In the Database field, enter the name of the database in RentWise. You can find the RentWise database name in the top left corner of the RentWise window:

When all data is entered in Plan-IT, click on the Save button and the connection is activated. From that moment, you no longer use the replacement cars from Plan-IT, but you are immediately linked to the replacement cars of RentWise.
Make sure that on every computer that is used for Plan-IT, RentWise has to be installed as well, or the connection will not work.
Using RentWise
When you turn on replacement car option in a work order now and you click on the button, instead of the Plan-IT replacement car window opening, you are immediately taken to the RentWise replacement cars window.

Since January 2017 Plan-IT has developed a connection with Afas in collaboration with Forque. With this connection, the calendar and days off can be collected from Afas and sent to Plan-IT.
This connection can be configured in the Windows Task Scheduled to run every night or once per week.
In this FAQ we will explain how the connection needs to be configured in Plan-IT:
- In the menubar, click on the option File.
- Select the option Employee.
- The employee window appears. In the field Name, click at the right on the button to select an employee.
- Then enter the employee code of Afas in the field External no. Only the data of employees where the external number is entered will be collected from Afas.

- Open a Windows Explorer window (Windows key
 + E).
+ E). - Go to the folder Plan-ITPrograms.
- Create the file Afas.ini.

- Put the following text in the Afas.ini file:

- Webservice = the Afas web address that should be entered here will be provided by Forque
- Token = The code to connect with Afas that should be entered here will be provided by Forque
- ConnectId = the code to recognize who wants to connect with Afas, will be provided by Forque
- BloksInMinutes = here you can configure how large the blocks of working time are, when you work with Plan-IT Online on time. Plan-IT will then automatically create the correct blocks. When you don't work with the Plan-IT Online on time module you can leave this empty. When you are not sure what to enter, please contact us to ask.
Start the Afas connection
You can now start the Afas connection:
- Open a Windows Explorer window (Windows key + E).
- Go to the folder Plan-ITPrograms.
- Start the program Afas_Koppeling.exe.

When you start it, the details from the Afas.ini file will be entered in the fields. Click on the button Afas bezetting ophalen.
When you are happy with the results, you can add this Afas_Koppeling.exeto the Windows Task Scheduler. Ask your system administrator to configure this. Pass parameter 1 along in the Windows Task Manager. This will let Plan-IT know that the Afas_Koppeling.exe is started as a task. This will make it start automatically and also close automatically when it is done.
Our advise is to let it run somewhere during the night, because this connection has to process a large amount of data, and can impact the performance noticable . When there are frequent changes in the calendars, we advice to let it run every night.
It's important to realize that Afas will become leading in regards to days off and the calendar. Days off that you have added manually to Plan-IT and that are not present in Afas will be deleted.
For more information about the Afas side of the connection, you can contact Forque.
When importing work orders from a DMS, the e-mail adresses of customer from the DMS have priority over the e-mail addresses that are in Plan-IT. E-mail addresses from a DMS are always leading.
The e-mail address that is saved in Plan-IT is only used when you manually create a work order in Plan-IT without importing a work order from a DMS.
In the Plan-IT settings for CaRe-Mail, there are however 2 options that can give e-mail addresses from CaRe-Mail priority over the e-mail addresses from the DMS:
- Click in the menubar on the option System.
- Select the option System settings.
- In the top row of tabs, go to Connections.
- Then go to CaRe-Mail in the second row of tabs.
- Check the options Always use CaRe-Mail e-mail address and CaRe-Mail als bron gebruiken voor de klantgegevens.

When 1 of these options is acivated, the e-mail addresses from CaRe-Mail are used instead of those from the DMS. Make sure to remove the checks from both of these options to make the e-mail addresses from the DMS leading.
When you work with Plan-IT, you no longer need to work with the ‘laatbak’ of Autoline. This saves a lot of work with creating a work order in Autoline.
You can turn off the ‘laatbak’ in Autoline with the following steps:
- Go to the module Urenverantwoording.
- Then select the preferred establishment.
- Open de option Menu - Systeemfuncties.
- Then go to the option Systeemparameters.
- In the section Diversen, remove the check from the box with the option Actieve toekomstplanning.

When you have turned off the ‘laatbak’ in Autoline, making the job lines clockable works as such:
Job lines change from status "M" to "B" when you select the key "in".
When the key is already "In" with extending morework, extra operations are loaded with status "M". Lines with the status "M' are not clockable and do not appear in the clock of Autoline either.
In practise, a mechanic clocks on the work order after extending where there's a line with the status " B" and starts working on the car. When converting the time, the used time is divided over the activities that are in the work order, also over the activities with the status "M".
Since Plan-IT version 5.171.7825 (january 2017) it is possible to report the appointment date back to Autoline. This makes the combination of Plan-IT and Autoline very strong.
Because it is not needed anymore to plan via the ‘Laatbak’. This whole part can be skipped in Autoline.
This way the users can create a work order much faster and with fewer clicks.
Autoline settings
First, you can turn off the ‘Laatbak’ in Autoline. (Contact CDK first to ask them what will be the consequences for your organization).
Turning off the ‘Laatbak’ can be done by the dealer, this is a parameter in the Systemparameters of Time accounting (Urenverantwoording) and can be found as such:
- Click in the main menu on the option Urenverantwoording
- Select the option Filiaal
- Go in the menu to the option Systeemfuncties
- Select the option Systeemparameters
- In the section Diversen turn off the parameter Actieve toekomstplanning
By turning off this parameter, the planning is activated.
You can now create a work order in Autoline. When saving the work order, it is sent to Plan-IT. It is scheduled in Plan-IT, and the data is Autoline is updated. You can now move the work order in Plan-IT and the planning date will be updated automatically in Autoline. Because of this it will always be in sync and it becomes much easier to move an appointment to another date.
When the customer delivers their car, the work order becomes scannable when it is reported 'key in'.
Below is a video how the returning back works:
Settings in Plan-IT
Follow the below steps to configure everything in Plan-IT:
- In the menubar, click on the option System.
- Select the option System settings.
- In the first row of tabs, go to Connections.
- In the DMS tab, turn on the option PON terugkoppeling Autoline webservice aanzetten.
- Enter the data for returning back. You can receive the inforation that you have to enter here from PON.

It's important to coordinate this with all parties (PON, CDK, Plan-IT, your internal organization) before configuring this.
What does Plan-IT return back to Autoline
When it is a Time appointment in Plan-IT, the information about the time appointment is returned back to Autoline. So the starting date, end date, starting time, end time of the time appointment.
When it is a customer waiting in Plan,IT, the starting date of the scheduled work order and the waiting time that is entered in Plan-IT are returned back to Autoline as starting time and total time of the work order.
When it is a deadline , Plan-IT returns back the starting time of the working day (8:00) and the end time that is entered as deadline time.
Since Plan-IT version v5.171.8713 also the times for collecting and returning cars or customers can be returned back. You can configure with a system setting per establishment whether you want to make use of this.
There is an extra check in Plan-IT whether the data is entered properly. So when a value is not entered somewhere, Plan-IT automatically takes a superceding value from the work order (scheduled date, starting time, end time, etc)
At this moment work orders are collected from Autoline via ODBC.
To make sure that all changes are included properly we have to check back in time a bit to collect all information properly. Because Autoline generates a log when the work order is opened. Through this log we check if there are changes in Autoline. We do this to make the query as efficient as possible and not burden Autoline more than needed.
The problem is in the difference between when the work order is opened and when the changes are actually made in the work order. We have to check back the difference in time in Autoline.
We used to check back 30 minutes in time. Because the amount of dealers that switched to Autoline was becoming bigger and bigger, and the OBDC connection slower and slower because of that, we have set this back to 5 minutes by default.
At the same time we have added the possibility for you, as a dealer, to be able to indicate how far Plan-IThad to check back in history. This can even be set back to 15 seconds.
This was the connection with Autoline will be much faster. However the problem is that the work order is not always sent over (the shorter the time, the better the work order has to be created in Autoline). The dealer can change this time themselves to find the perfect balance in time and speed for their organization (when a work order is not sent over, it can very simply be opened again it Autoline and it will be sent over immediately to Plan-IT).
Benefits: The connection is much faster when the time is set to 5 minutes. In 90-95% of the situations a work order will be created correctly in Autoline and you will have this benefit.
Downsides: It can happen that a work order is not visible in the import list. The work order needs to be opened in Autoline again and it will be sent over. When a work order is saved in Autoline and it is not in the import list after 30 seconds, you need to open the work order in Autoline once more and it will be visible in the import list then.
How can you configure this?
In the Data directory of Plan-IT is the file Autoline.txt. On the 4th line you can enter a value of how many seconds Plan-IT needs to check back in time for Autoline work orders. The minimal value is 15. You need to decide what is best for your own organization. By default, Plan-IT works with 300 seconden (5 minutes) when no value is entered on the 4th line.
You should think in values of 30, 60, or 120 seconds to make the connection faster.
However when you have to reopen a work order to often before it is visible in the import list of Plan-IT, you can choose to let the connection check back further in time. Especially when you are not noticing any speed issues. Think of values of 600 seconds (10 minutes) or 1800 seconds (30 minutes).
The Autoline_JaarKalenderRun.exe program is used to collect the active work schedule of the mechanics from Autoline. This function overwrites the calendar of Plan-IT with the calendar from Autoline. With the use of parameters, the function can be used for several purposes.
Attention: this program must be started on the server where the ODBC is running.
Below is a description pf the parameters and when you can use which settings.
Parameter 1: This parameter is to specify wether a centralized or decentralized calendar file is used in Autoline. These are the options:
0 = Work schedule is managed per establishment in Autoline.
1 = Work schedule is managed centralized in Autoline.
Parameter 2: This parameter is to specify how much logging you want to see when the service is running. This logging can be used for debugging. There are several options:
1 = Minimal logging (only that the service is started or accidently stopped)
2 = Maximum logging (here the system will give detailed feedback what queries are used and what is the response of Autoline)
Parameter 3: This parameter is to specify what type of database name is used by Autoline. This parameter is always 0 (because this is no longer specified with a parameter value, but instead in the the ODBC connection)
Parameter 4: This parameter is to specify how many days need to be collected from Autoline. There are several possibilities. Each possibility can be used for a certain reason:
1 = Today + 2 days in the future (this could be started each morning via Windows task scheduler for example. The first 2 days in the future will then always be the same in Autoline and Plan-IT)
2 = System setting several months in advance. (This could be started each weekend via Windows task scheduler for example. The calendar in Plan-IT will then be the same as in Autoline for the next few weeks)
3 = Rest of the year. (This could be started once per month via Windows task scheduler for example. If someone would get a different work schedule in the future, it will also be correct in Plan-IT)
Parameter 5: This parameter is to specify whether a work order should be blacked out (and be included on the differences list) when the calendar is changed in such a way that the work order would not be possible with the new calendar.
0 = The option is turned on, work orders will become black when they fall outside the new work schedule and are put on the differences list.
1 = The option is turned off, work orders keep their original color and are not put on the differences list.
Parameter 6: This parameter is to specify what blocks of time are to be used. This parameter must be specified when Plan-IT Online on Time is used. Specify the size of the blocks in number of minutes. Options are 15, 30, 45, 60, 75, 90, 120, 150 minutes. When no value is specified (so 0) the length of a block from Autoline is automatically used.
Parameter 7: This parameter is to specify whether the changed calendar should also be initialized to the online module.
0 = Capacity is initialized to the online module. (This will be the default setting)
1 = Capacity is not initialized to the online module. (This option will be used when the capacity is already initialized through another task, and does not need to be initialized twice. For example, when the Maintenance.exe program is used to initialize the capacity to the online module)
The Autoline_Statussen.exe program is used to collect statuses from Autoline and process them in Plan-IT. This function is also used to perform an extra check if the planning date in Plan-IT matches the planning date in Autoline. Important information is collected from Autoline again (customer waiting, time appointment, edited receptionist) and corrected in Plan-IT.
There are several possibilities to collect the data. This is managed with the use of parameters.
Attention: this program must be started on the server where the ODBC is running.
Below is a description of these parameters:
Parameter 1: This parameter is to specify whether a centralized or decentralized reception file is used in Autoline. These are the options:
0 = Receptionists are managed per establishment in Autoline
1 = Receptionists are managed centralized in Autoline
Parameter 2: This parameter is to specify how much logging you want to see when the service is running. This logging can be used for debugging. There are several options:
1 = Minimal logging (only that the service is started or accidently stopped)
2 = Maximum logging (here the system will give detailed feedback what queries are used and what is the response of Autoline)
3 = Logging to follow the CRM_API
5 = Logging to investigate indexing issues
Parameter 3: This parameter indicates which connection should be used. There are several options:
-1 = This is the default connection when the ' laatbak' of Autoline is turned on with the time notation 9.00
0 = This is the default connection when the ' laatbak' of Autoline is turned on with the time notation 9,00
1 = This is the Stern connection
2 = This is the ASV connection
3 = This is the Amega connection
4 = This is the Wensink connection
5 = This is the BMW connection
6 = This is the default connection when the ' laatbak' of Autoline is turned off
11= This is the same as parameter 6, but an extra check is done for the sleutel uit date relative to the planning date. This will make sure that the collected status is processed better with follow-up appointments in Autoline.
(Values -1, 2, 4, 5, and 6 are the same. So it does not really matter what value is used, but for voor consistency this value is usually kept the same as the 3rd parameter of the Autoline_Werkorders.exe program)
Parameter 4: This parameter is to specify if a check must be performed wether the planning date in Autoline is different than the planning date in Plan-IT. When this parameter is set to 0, this check is performed. When the parameter is set to 1, the check will NOT be performed. When the laatbak is turned off, this parameter is usually set to 1 because you will then not use the planning from Autoline anymore, and it doesn't make sense to perform this check.
Parameter 5: This parameter indicates how long the service must wait until performing the next run. When nothing is entered here, it will be set to 0 by default and the program will wait for 10 minutes. Any value can be entered here, the value is in seconds. Minimal value is 30 seconds.
De meest voorkomende instelling is: Autoline_Statussen.exe 1 1 6 1
The Autoline_Werkorders.exe program is used to get work orders from Autoline and make them available for Plan-IT.
There are many different ways to collect these work orders. By using parameters, you can indicate how the Autoline_Werkorders.exe collects the work orders.
Attention: this program must be started on the server where the ODBC is running.
These parameters are described below:
Parameter 1: This parameter indicates if a centralized or decentralized reception file is used in Autoline. The options are:
0 = Receptionists are managed per establishment in Autoline
1 = Receptionists are managed centralized in Autoline
Parameter 2: This parameter indicates how much logging you want to see when the service is running. This logging can be used for debugging. There are several options:
1 = Minimal logging (only that the service is started or accidently stopped)
2 = Maximum logging (here the system will give detailed feedback what queries are used and what is the response of Autoline)
3 = This logging shows if a work order already exists in any establishment
4 = This logging checks if the connection with Autoline is being made
5 = This logging checks if there is a problem that makes the service freeze.
Parameter 3: This parameter indicates which connection should be used. There are several options:
-1 = This is the default connection when the ' laatbak' of Autoline is turned on with the time notation 9.00
0 = This is the default connection when the ' laatbak' of Autoline is turned on with the time notation 9,00
1 = This is the Stern connection
2 = This is the ASV connection
3 = This is the Amega connection
4 = This is the Wensink connection
5 = This is the BMW connection
6 = This is the default connection when the 'laatbak' of Autoline is turned off.
7 = This is the default connection when the 'laatbak' of Autoline is turned off, with the addition that extra owner and driver information is being collected.
When using connection 7, the work order in Autoline has to meet the following conditions:
- The work order in Autoline must have a receptionist linked.
- The work order in Autoline must have a customer date entered, that lies in the future.
- The work order in Autoline can not be invoiced yet.
- The work order in Autoline must have a registration number. (may also be the last 6 characters of the VIN number, as long as something is filled in)
8 = This is the default connection when the 'laatbak' of Autoline is turned off, but the customer date and time do not have to be entered in Autoline. (see parameter 7 option 2) This option is active since Plan-IT version 5.171.8713.
9 = This is the same connection as option 7, but with another date notation. This option is active since Plan-IT version 5.171.8900.
11 = This is the same connection as option 7, but the field BEMAIL is not collected anymore. Use this connection when there are error messages for BEMAIL in the logging.
Parameter 4: This parameter indicates how long the service must wait until performing the next run. When nothing is entered here, it will be set to 0 by default and the program will wait for 6 seconds. Any value can be entered here, the value is in seconds.
Parameter 5: This parameter must be set to 1 when multiple ODBC users are used to connect with Autoline. When a dealer has many establishments, we advice to use multiple ODBC users to connect.
Parameter 6: When multiple ODBC users are used to connect with Autoline, specify in this value how many establishments this connection needs to process. (when there are 4 establishments for example, enter value 4)
Parameter 7: When multiple ODBC users are used to connect with Autoline, specify in this value which ODBC user this service will process. So when this is the 2nd ODBC is for example, then enter value 2. This means that this service (taking parameter 6 into account) processes establishment 5 to 8.
The most commonly used setting is: Autoline_Werkorders.exe 1 1 7
The Autoline_VrijeDagen.exe program is used to collect days off from Autoline and process them in Plan-IT.
There are several possibilities to fetch the data. This can be configured with the use of parameters.
Attention: this program must be started on the server where the ODBC is running.
Below is a description of these parameters:
Parameter 1: This parameter is to specify whether a centralized or decentralized file is used for the reasons for a day off in Autoline:
0 = Reason for day off is managed per establishment in Autoline
1 = Reason for day off is managed centralized in Autoline
It usually is a centralized file. So usually parameter 1 is used here.
Parameter 2: This parameter is to specify how much logging you want to see when the service is running. The logging can be used for debugging. There are several options:
1 = Minimal logging (only that the service has started or accidently stopped)
2 = Maximum logging (here the system will give detailed feedback what queries are used and what is the response of Autoline
5 = This is an index rotation check. When you have the feeling that collecting vrijedagen is not working, you can check for an index issue in Plan-IT with this parameter
Parameter 3: This parameter is to specify which connection should be used. There are several options:
0 = This is the default connection that should be used for most dealers
1 = This is the Stern connection
2 = Mercedes
4 = Wensink
Parameter 4: This parameter indicates how many seconds should be between each run. Minimal amount is 900 seconds (15 minutes). When a 0 is entered here, it will automatically be set to the default value of 900 seconds.
This is usually just set to 0 unless there are companies that want to check for days off less often because there system is slow.
Parameter 5: This parameter is to specify whether days off in Plan-IT, that are not in Autoline, should be deleted in Plan-IT. There are two options:
0 = Days off are not deleted from Plan-IT. This gives the possibility to create days off directly in Plan-IT, outside of Autoline. However, this means that when a day off is deleted in Autoline, it will not be deleted in Plan-IT.
1 = Days off in Autoline are leading. Days off that are not in Autoline are automatically deleted in Plan-IT.
The most used setting is: Autoline_VrijeDagen.exe 1 1
Autoline uses a limited number of work order numbers. When Autoline has used all work order numbrs, Autoline starts using the work order numbers from the beginning again.
Because work order numbers in Plan-IT are unique, reusing work order numbers that already exist in Plan-IT causes problems.
To solve this, you can perform a Cleanup in Plan-IT. This will delete all work orders that are older than a date that you can specify. This way you prevent problems when Autoline will start reusing the same work order number from the beginning.
When your system administrator performs a cleanup every 6 months, you will never encounter this limitation of Autoline.
Follow the below steps to perform a cleanup:
- Click in the menubar on the option System.
- Select the option System settings.
- Go to the tab System.
- Click in the topright corner of the window where you are now on the button Cleanup.
The Clear data window appears. The top part is for deleting old work orders.
- Click on the button to select the date you want. We advise a date of 6 months ago.
- Click on the button Cleanup.
The system starts deleting all work orders older than the specified date. This may take a while, especially when it's the first time that you perform the cleanup. The cleanup process finished when the small windows disappears.
When you don't see work orders in your importwindow anymore,follow the below steps to fix this:
DMS-login name
In the importwindow, workorders can be filtered on login name. When a login name is entered, the system will only show work orders that are created by the entered loginname.
Click on the Login name button and enter your DMS-login name again. When you press the Enter key without entering a login name, the system will show all work orders without filtering.
Filter on departments
There can also be filters active in Plan-IT that hide work orders from certain Autoline departments.. Controleer welke departments worden overgestuurd:
- Click on the menubar on the option System.
- Select the option System settings.
- Click on the tab Connections.
- In the bottom right corner is a field in which you can indicate what departments from Autoline need to be transferred. Departments that are not entered here will not be transferred.
- Remove all departments as a test, because departments will then not be filtered and all departments will be transferre. Check if there are work orders visible then.
Work order conditions
Check if the work orders from the DMS-system meet the conditions of Plan-IT.
Plan-IT only shows work orders in the importwindow that have a date, time, and registration number entered. When one of these is missing, the work order is not displayed in the Plan-IT importwindow.
Importlocation
Check if the location where Plan-IT searches for the import files is properly entered:
- Start Plan-IT and log in with an account that has administrator rights.
- Click in the menubar on the option System.
- Select the option Management.
- Click with the right mouse button on the green PLAN-IT balk in the top of the window.
- Select the option Systemsettings.

- Check if the correct DMS-system is selected in the DMS link field.
- Check if the correct folderis entered in the Import field.

You can check this by copying the folder location and opening it in a Windows Explorer window. At the same time you ill be checking if your computer has access to the folder location.
- Copy the location that is entered in the Import field.
- Open a Windows Explorer window (Windows key + E).
- Paste the location in the address bar in the top and presss the Enter key.

Check if you can go to the copied location in Windows Explorer, and if the XML files are being transferred to the folder. Check the date and time of the files, this is when they have been put in the folder.
Background tasks
When there are no XML files being transferred to the importfolder, the tasks on the server may no longer be active. Restart the background tasks on the server and test if there are XML filed being transferred to the importfolder after that.
You can also use a program such as Firedaemon to manage the background tasks and have them restarted every night to prevent issues in the future.
Network connection
Another cause can be that the network connection with the disk where the importfiles are stored is disrupted. This is often depicted as a red cross through the network connection. There can also be the message Network connection disrupted next to the disk.
When this is the case you can try to restart your computer. When logging in to your system, network connections are usually reconnected.
When this does not solve the problem either, then contact your system administrator.
There are many processes in Plan-IT that influence the capacity. All these processes also influence the capacity of the online module.
It is possible to update the entire online capacity of all departments with 1 task.
By doing this once a week for example, you could turn off many update capacity options.
You can run all processes like they are running now (import_werknemers.exe, Autoline_JaarkalenderRune.exe etc.)
By running the maintenance.exe as the last task, the online capacity is always correctly updated.
To start maintenance.exe:
- Open a Windows Explorer window (Windows key + E).
- Navigate to the Plan-ITPrograms folder.
- Double click on the file maintenance.exe to start the program.

The Maintenance window appears. Click on the option Initialise capacity online module to send the capacity of all establishments to the online module.

Sending over the capacity can take some time. Wait until the pop-up window appears with the message that the process is finished and click the OK button.

Task scheduler
You can also set up the program in the Windows task scheduler to automatically update the capacity each week. To do this, click on the option Create Basic Task... in the Windows task shceduler.
In the first step, enter a name for the task in the Name field and click on the Next button.

With the step Trigger select how often the task should be performed. Then click on the Next button again.

In the next step, specify at what moment the task must be performed. Make sure that the task is performed outside working hours, because updating the capacity has a big impact on the performance of Plan-IT. Then click the Next button again.

In the Action step, select the option Start a program and click the Next button again.

Click on the Browse... button and navigate to the installation folder of Plan-IT. Select the file Maintenance.exe and click on the OK button. Then enter the value 2 in the Add arguments field, and enter the location of the installation folder of Plan-IT in the field Start in (optional). Then click on the Next button again.

Finally check on the Finish step if everything is properly filled in and click the Finish button to save the task.

It is possible to keep an exception list with phone numbers of customers that have indicated they don't want to be contacted per SMS.
Plan-IT checks this exception list when scheduling each SMS message (reminder, car ready, manual SMS). When the phone number is included on the exception list, no SMS message will be sent or scheduled. You can read back in the logging of the work order that an SMS message is not being sent because it is on the exception list.

This way you'll prevent that customer will receive SMS messages while they have indicated they don't want to.
Import exception list in Plan-IT
In the Plan-ITPrograms folder is the program Maintenance.exe:

When you start it, select the option Import Exceptionlist Mobile numbers for SMS:

Plan-IT will then search for the file Mobile.csv in the Plan-ITImport folder (if the Import folder does not exist yet, create it).
Enter the phone numbers in the file Mobile.csv underneath each other, every new phone number on a separate line:

It is also possible to have this program be performed automatically with Windows task scheduler, so that newly added phone numbers are imported each week for example. To do this, add the parameter 3 to Maintenance.exe.
If you need additional assistance, you can always contact us for that.
It is possible in Plan-IT to send automatic SMS reminders to customers. You need a Plan-IT SMS account to be able to do this.
Follow the below steps to turn on the Plan-IT SMS module:
- Click in the menubar on the option System.
- Select the option System settings.
- In the first row of tabs, go to Connections.
- Then to to SMS in the second row of tabs.
- In the field SMS module, select the option Plan-IT SMS.
- Enter the User name and Password of your Plan-IT SMS account.

Set SMS reminder
When the Plan-IT SMS module is turned on, follow the below steps to set the SMS reminder:
- Put a check in the box with the option Automatic SMS reminder.
- When you turn on the option Always ask wether the SMS reminder should be sent, Plan-IT will always first ask for permission to send the reminder via a pop-up window.
- In the field Number of days before sending reminder SMS, enter how many days in advance you want to have the SMS reminders sent.
- In the field Time for sending reminder SMS, enter at what time you want to have the SMS reminders sent.
- In the fields wth the option SMS number should start with, you can enter that a mobile phone number should always start with 06 for example, to prevent sending SMS reminders to landline phone numbers.

Create SMS texts
Then you create the SMS texts. In the top of this window, click right from the field Sender, on the button Manage SMS texts. The window SMS beheer opens:

In the field Display, select wether the SMS reminder is used in all departments or only in the current department.
In the field Model, select what kind of SMS reminder you want to create. You can choose between the following models SMS reminder:
| Reminder time bound | the SMS reminder that is sent when the option Time appointment is turned on in the work order. |
| Reminder | the default SMS reminder that is sent when the option time appointment is not turned on and deliver/collect car are not filled in. |
| Reminder collect car | the SMS reminder that is sent when the option Collect car is turned on and Company collects car is selected in the work order. |
| Reminder return customer | the SMS reminder that is sent when the option Deliver is turned on and Company returns car is selected in the work order. |
In the field Text, enter the text for the SMS reminder.
There are several tags that you can use in SMS messages:
| [KENTEKEN] | this tag will be replaced in the SMS message by the license plate number that is entered in the work order. |
| [DATUM] | this tag will be replaced in the SMS message by the starting date of the work order. When the option time appointment is turned on, that customer date will be placed here. |
| [TIJD] | this tag will be replaced in the SMS message by the starting time of the work order. When the option time appointment is turned on, that customer time will be placed here. |
| [RECEPTIE] | this tag will be replaced in the SMS message by the name of the receptionist that is selected in the work order. |
| [VESTIGING] | this tag will be replaced in the SMS message by the name of the establishment in which the work order is scheduled. |
| [KLANT] | this tag will be replaced in the SMS message by the name of the customer that is selected in the work order. |
With this you can for example create a reminder time bound with the text: We are expecting you at [TIJD] and have the time that is entered in the time appointment field from the work order, placed in the SMS reminder.
Using SMS reminder
To indicate in a work order that you want to have an SMS reminder sent, put a check in the box with the option SMS service. Check if the correct mobile phone number is entered in the field next to it, this is normally automaticlally taken from the customer details after a registration number is entered in the work order.

With turning on the SMS service option, the SMS reminder for this work order is set up to be sent. Depending on how many days in advance and the time that are set in the system settings, the prepared SMS reminders are sent out each day.
Plan-IT also takes the moving of work orders into account:
- When a work order is being moved to the past, a prepared SMS reminder will not be sent.
- When a work order, for which an SMS reminder already has been sent, is moved to a later date, the SMS reminder is sent again when it meets the conditions.
Follow the below steps to turn on the Plan-IT SMS module. You need a Plan-IT SMS account to be able to do this.
- In the menubar, click on System.
- Select the option System settings.
- In the first row of tabs, go to Connections.
- Then go to SMS in the second row of tabs.
- In the field SMS module, select the option Plan-IT SMS.
- Enter the User name and Password of your Plan-IT SMS account.

Besides that, you have the option Send SMS at status car ready in this window. When you turn on this option, Plan-IT will sens an SMS message when in the workorder the option SMS service is turned on, the option Internal order is turned off, and the status of the work order is changed to Ready. Plan-IT will send the SMS message to the mobile phone number that is entered in the customer details in the work order.

Manage SMS texts
It is also possible with the SMS module to send an SMS message to the customer directly from the work order. You can create and manage these messages yourself. Open the Manage SMS window by clicking the Manage SMS texts button.

Here you can enter all default texts for the SMS module. In the field Display, select wether the SMS reminder is used in all departments or only in the current department.
There are 2 types of messages:
- Separate SMS text: these are default texts that the users will see when they want to send an SMS message to a customer from the work order. To keep a certain standard within the organization, you can compose default texts here. The user can then select these from a selection list and if needed change it a little.
- Car ready message: this is the message that will be sent to the customer when you change the status of the work order to Ready.
There are several tags that you can use in SMS messages:
| [KENTEKEN] | this tag will be replaced in the SMS message by the license plate number that is entered in the work order. |
| [DATUM] | this tag will be replaced in the SMS message by the starting date of the work order. When the option time appointment is turned on, that customer date will be placed here. |
| [TIJD] | this tag will be replaced in the SMS message by the starting time of the work order. When the option time appointment is turned on, that customer time will be placed here. |
| [RECEPTIE] | this tag will be replaced in the SMS message by the name of the receptionist that is selected in the work order. |
| [VESTIGING] | this tag will be replaced in the SMS message by the name of the establishment in which the work order is scheduled. |
| [KLANT] | this tag will be replaced in the SMS message by the name of the customer that is selected in the work order. |
When you have turned on the logging in Plan-IT, you can read back there if an SMS message has been sent.
SMS usage
In the system settings of the SMS module, click the Usage SMS button to open the website where you can see your usage. Your login name and password are automatically entered on the website (these are the same as in the system settings window).
In the field Saldo credits you can see how many SMS messages you can still send within your current bundle.

You can also indicate that you want to receive an e-mail when your saldo (balance) drops below a certain value (because you will have to purchase a new bundle yourself to make sure that your SMS messages keep working).
In the section Overzicht berichten you can find a log of all SMS messages that have been sent..

Request Plan-IT SMS module
When you want to receive more information regarding our SMS module or want to start using our SMS module, you can request this with your accountmanager (Leon Wonnink: LeonWonnink@plan-it.nl) or via our helpdesk (contact@plan-it.nl).
Request new SMS block
Also requesting new SMS blocks can be done via LeonWonnink@plan-it.nl or via contact@plan-it.nl
Plan-IT SMS module costs
We do not change monthly costs for our SMS module. You only pay for sending the SMS messages.
You purchase a prepaid SMS bundle that fits best with your expected usage and you will be informed automatically per e-mail when these are almost used up (you can configure when you want to receive this e-mail yourself).
We offer 4 bundles:
| SMS Block 1 | 1.000 SMS messages | € 150,– |
| SMS Block 2 | 5.000 SMS messages | € 650,– |
| SMS Block 3 | 10.000 SMS messages | € 1.100,– |
| SMS Block 4 | 25.000 SMS messages | € 2.375,– |
* These prices apply for 2019.
Follow the below steps to activate the tyremanager.
Attention: you need master rights in Plan-IT to be able to open the management module.
- Click in the menubar on the option System.
- Select the option Management.
- Click with the right mouse button on the green PLAN-IT bar and select the option System settings.
- The System window appears. Put a check in the box with the option Tyre manager.

There are several additional options to configure in the tyre manager:
You can enter in which months the summer and winter seasons are. The summer season gives a message when you have summer tyres in storage, and the customer still has winter tyres on their car. You can indicate here in which months you want to get this message. The same goes for the winter period.
Below that, you can indicate whether you want to register tyre profile conditions. It is advisable to activate this option. This can help to keep the customer informed of the profile of their tyres and when it's time for new tyres. The safe profile will show the profile in green when it is over the number of millimeters that is entered here. The profile turns red when it drops below the number of millimeters that is entered with unsafe profile. Everything between those 2 values is shown yellow. This way you can quickly see if the customer needs a new tyre.
You can also turn on an option to register the make of tyres. This can help you to find back the correct tyres more quickly in the storage. Therefor it is recommended to turnon this option. It will not be required to enter the make of the tyres, but you will be given the option to do so.
How does it work in practise
When you enter the Registration number of the customer, Plan-IT checks the starting date of the work order. Then Plan-IT checks if the tyre manager is activated and if the starting date of the work order falls in a summer or winter change period. When this is the case, Plan-IT will check with a summer period if there are summer tyres in storage, and if so, give a pop-up message with the question if you want to schedule a winter change. When you click on the Yes button, Plan-IT will put a check in the box with the option Change tyres.

With the Tyres in storage button, you open the View stored tyres window in which you can view the details of the stored tyres. You can also see the profile of the tyres here, and inform the customer that it is time for new tyres if needed

When you change the status of a work order with the option Change tyres turned on to Ready, Plan-IT will ask in a pop-up message if the tyre change really has been performed.

When this is the case, click the Yes button. The View stored tyres window is opened, and you can process the tyre change. Enter the profile depth and click the OK button. The tyres are then stored again and stay in the system until the next tyre change period.
E-mail to warehouse
Plan-IT has an extra option where the system can send an e-mail to the warehouse with the details of the tyres and the appointment. Follow below steps to activate this:
- In the menubar click on the option System.
- Select the option System settings.
- In the first row of tabs, go to Connections.
- Go to Mail in the second row of tabs.
- First enter the details of the Mailserver in the top of the window. Ask your system administrator for the correct details.
- Then enter the e-mail address of the warehouse in the field Automatic e-mail to warehouse when tyre change is checked.

With this, after every completed tyre change, an e-mail is sent to the warehouse to inform them.
If preferred, you can turn on the option Always ask whether the e-mail should be sent to get a pop-up window for each work order to specify if whether an e-mail should be sent in that case.

Follow the below steps to turn on the tyrechange mail:
- In the menubar click on the option System.
- Select the option System settings.
- In the top row of tabs, go to Connections.
- Then go to Mail in the second row of tabs.
- Enter your mailserver details (you can receive these from your system administrator) and also enter the sender.
- Lastly enter the e-mailaddress of the warehouse in the field Automatic e-mail to warehouse when tyre change is checked hto turn on this functionality.

After these steps, the tyre change mail functionality is active. When you put a check in the box with the option Change tyres now, an e-mail with the request for the tyre change is automatically sent to the warehouse when saving the work order.

The warehouse can then take all steps to make sure that the yres are present in the workshop at the right date.

When moving the work order to another date, an automatic e-mail will be sent again to the warehouse with the old and the new appointment date.

Follow the below steps to activate this function.
Select agreement
Fiest select a replacement car agreement.
- In the menubar, click on the option System.
- Select the option System settings.
- In the first row of tabs, go to Replacement car.
- Then go to Settings in the second row of tabs.
- In the field Replacement car selection document, select replacement car agreement 1, 3, or 4.

Enter number of kilometres
Next step is to enter the current number of kilometres fr each replacement car.
- In the menubar, click on the option File.
- Select the option Replacement car.
- In the Model field, click on the button to select a replacement car.
- In the field Number of Kilometres, enter the current number of kilometres for the replacement car.

When the above settings are filled in correctly, Plan-IT will make sure that you have a subsequent kilometer registration.
How does it work in practise
When scheduling a new reservation for a replacement car, fill in all details as usual but leave the field kms starting position empty.

When a customer comes to take the replacement car, put the status of the reservation in Plan-IT on Car runs. At that moment, Plan-IT fetches the number of kilometres from the replacement car details and puts it in the field kms starting position of the reservation.

The reservation will also turn yellow to indicate that the customer has taken the replacement car. When the customer returns the replacement car again, select the status Car return.

A pop-up appears where you can enter the number of kilometres that is now on the replacement car.

Enter the number of kilometres and click on the Save button to save the entered number of kilometres in the field kms final position in the reservation and also update the field Number of kilometres in the replacement car details. When you set the status of another reservation to Car runs now, the new number of kilometres will be entered in the field kms starting position. This way you have a subsequent kilometer registration.
For this to work, it is very important with changing the statuses to follow the order of when customers are actually taking and returning replacement cars.
Additionally you can click the Print button in the bottom of the replacement car window to generate a list that will show the number of kilometres per replacement car for each reservation. This way you have a subsequent kilometer registration.
It has always been possible in Plan-IT to send an e-mail to the replacement car department when the replacement car option is turned on in the work order (when no replacement car from Plan-IT is selected).
Follow the below steps to turn on an option to always get a pop-up window, asking if an e-mail should be sent to the replacement car department.
- In the menubar, click on the option System.
- Select the option System settings.
- In the first row of tabs, go to Connections.
- Then go to Mail in the second row of tabs.
- Put a check in the box with the option Always ask if the e-mail needs to be sent. Even if a native replacement car is selected.

With this option turned on, Plan-IT will show a pop-up window with each work order where replacement transport is selected, asking if you want to have the replacement car e-mail to be sent, also when a native Plan-IT replacement car is selected:

This way you can inform the replacement car department about the prerference of the customer regarding the replacement transport. (You do not create replacement cars in Plan-IT, but different types of cars).
Specific e-mail address
You have the option to enter a specific e-mail address for a replacement car. WHen an e-mail address is entered here, Plan-IT will send the replacement car e-mail to this e-mail address. This makes it possible to use multiple replacement car departments. Depending on the selected replacement car, the e-mail will go to another department.
To configure a specific e-mail address for a replacement car:
- In the menubar, click on the option File.
- Select the option Replacement car.
- The Replacement car window appears. In the field Type, click on the button to select a replacement car.
- Then enter a specific e-mail address in the field E-Mail where the e-mail should be sent to when this replacement car is selected in a work order.

When no specific e-mail address is entered in a replacement car, Plan-IT will automatically use the mail e-mail address that is entered in the System settings.
It is possible in Plan-IT to schedule replacement cars. You only need to link a replacement car to a work order and the rest is managed automatically.
However in many situations, companies have a central replacement car department that manages the planning over multiple establishments (for example Rentwise). In those type of situations it can be useful to turn on the replacement car mail functionality of Plan-IT. This will enable you to have an automated mail sent to your replacement car department when scheduling a replacement car.
Configure replacement car mail
- In the menubar, click on the option System.
- Select the option System settings.
- In the first row of tabs, go to Connections.
- Then go to Mail in the second row of tabs.
- First, enter your own internal mailserver details in the top of the window to give Plan-IT the ability to send mails.
- Then specify in Automatic e-mail to replacement car department to what e-mailaddress you want the messages to be sent to.

These settings are applied to only the current establishment. When the above settings have been configured, the functionality is active.
In Plan-IT you no longer select the replacement car from the Plan-IT list, but you only put a check in the box replacement car and leave the field empty.

When saving the work order, Plan-IT automatically sends an e-mail to the replacement car department.

We advise to keep using your loan bicycles in Plan-IT as usual. You still select loan bicycles in the Replacement car field. Plan-IT will then not send an e-mail to the replacement car department, only when you leave the replacement car field empty.
Since version 5.171.9020 it is possible to use the replacement transport of another establishment.This makes it possible to use the same replacement cars in multiple establishments.
It is important however that all establishments that use the same replacement transport, also use unique work order numbers. This means that the work orders have to come from the same DMS establishment. Otherwise you will run into the problem that the same work order numbers from multiple establishments will be used, and that the replacement transport is not linked properly.
Also when manually creating work orders, it is important that each establishment uses their own work order number range in Plan-IT.
Set database
Follow below steps to turn this on:
- Click in the menubar on System.
- Select the option System settings.
- Click on the tab Replacement Car.
- At the option Replacement car database, select from which establishment you want to use the replacement transport.
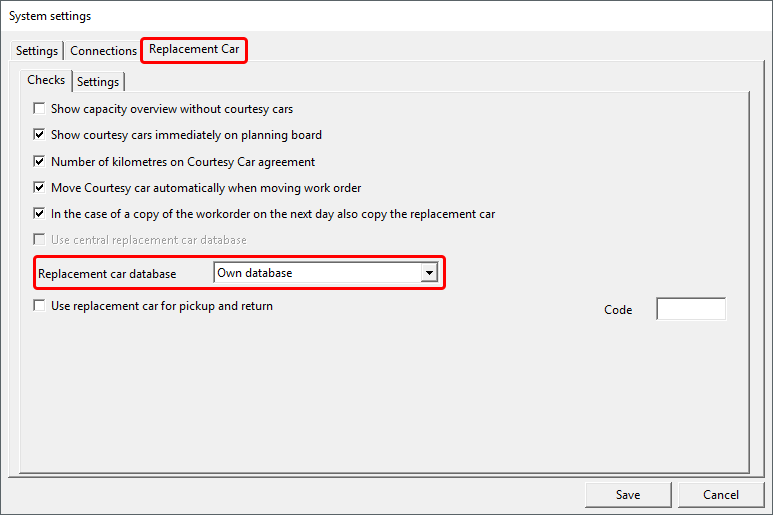
Set other work order number range
Follow below steps to set a unique work order number range. Do this for each establishment:
- Click in the menubar on System.
- Select the option System settings.
- Click on the tab Replacement Car.
- Go in the second row of tabs to Settings.
- At the Replacement car number, enter a unique number range. So for example for establishment 1 you enter 100000 and for establishment 2 you enter 200000.

- Then click in the first row of tabs on Settings.
- Go in the second row of tabs to System.
- At the option Werkordernummer, enter a unique number range as well for work orders in the establishment. ook een uniek nummerbereik in voor werkorders in de vestiging. So for example for establishment 1 you enter 100000 and for establishment 2 you enter 200000.

DMS reference
Follow below steps to set a DMS-reference. Do this again for each establishment:
- Click in the menubar on System.
- Select the option Management.
- Click with the left mouse button on an establishment to select it.
- Then click with the right mouse button on the establishment and select the option Edit from the contextmenu.

The Edit establishment window appears. In the top right corner, at the Extern option, enter the reference to the DMS-system. Make sure to only refer to an establishment within the same DMS-system. SO an establishment 10 can only refer to other establishments that also have establishment 10 at the external reference so that they are in 1 work order range.

First activate the possibility to work with receptionists in Plan-IT.
Keep in mind that these settings are applied for each establishment separately.
When a receptionist is active on multiple establishments, they have to be configured in all establishments.
- Click in the menubar on the option System.
- Select the option System settings.
- In the first row of tabs, go to Settings.
- Then go to Checks in the second row of tabs.
- Put a check in the box with the option Reception.

Further it is important to enter the reception code from the DMS-system (Dealer Management System) in Plan-IT. This code needs to be linked to the full name of the receptionist.

After that is configured, you select the correct receptionist in a work order. It will automatically be sent over to most connections.

When you have checked all these settings, the correct name should appear on the appointment confirmation of CaRe-Mail.
It is possible to keep an exception list with e-mail addresses of customers that have indicated they don't want to be contacted per e-mail.
Plan-IT checks this exception list before sending each e-mail message (appointment confirmation). When the e-mail address is included on the exception list, no e-mail message will be sent. You can read back in the logging of the work order that an e-mail is not sent because it was on the exception list.
This way you'll prevent that customer will receive e-mails while they have indicated they don't want to.
Import exception list in Plan-IT
In the Plan-ITPrograms is the program Maintenance.exe:

When you start it, select the option Import Exceptionlist E-Mail for appointment confirmation:

Plan-IT will then search for the file Email.csv in the Plan-ITImport folder (if the Import folder does not exist yet, create it).
Enter the e-mail addresses in the file Email.csv underneath each other, every new e-mail address on a separate line:

It is also possible to have this program be performed automatically with Windows task scheduler, so that newly added e-mail addresses are imported each week for example. To do this, add the parameter 4 to Maintenance.exe.
If you need additional assistance, you can always contact us for that.
With the option Block overcapacity Plan-IT makes sure that the planner can only schedule work orders until the capacity is used up. After that, no more work orders can be scheduled.
Attention: The block overcapacity option only applies to users with User rights.
Users with Administrator and Master rights can always schedule over the macimum capacity.
Since version 5.171.8713 of Plan-IT it is possible to overwrite this option for User+ rights.
Follow below steps to activate this option:
- In the menubar click on the option System.
- Select the option System settings.
- In the first row of tabs go to Settings.
- Then go to Checks in the second row of tabs.
- Put a check in the box with the option Block overcapacity .

The idea behind this option is to keep some room in the planning for drop-ins and emergency jobs. The blocking does not apply to the current day!
By configuring a percentage for the employees, you can indicate how much work is allowed to be scheduled for an employee. There can be scheduled until the available quarters of an hour are used up. After that a pop-up message appears:

When you set an employee to 0% active in count, Plan-IT shows that the days are blocked with the color of the employee. You can only schedule work orders on this employee on the current day.

Because bloking overcapacity works on the occupation it is important that you properly configure the maximum number of months you want to schedule ahead in the system settings. To do that, follow the below steps:
- Click in the menubar on the option System.
- Select the option System settings.
- In the first row of tabs, go to Connections.
- Go to Online module in the second row of tabs.
- In the field Months capacity, select how many months you want to schedule in advance.

Select for example that you want to schedule a maximum of 3 months ahead. Plan-IT will then build the capacity 3 months ahead. When you are in doubt, it is better to select too many months than too few.
Why can there no longer be scheduled in the future?
Make sure that the months capacity is properly configured in the system settings. When you have modified the number of months and you are back in the planning board, press the key combination Ctrl+Q to send over the capacity, taking into account the newly configured number of months.
Why can there be scheduled more than what is configured?
Plan-IT only blocks overcapacity when the configured maximum capacity is used up. This means that when you still have 2 quarters of an hour left, you can theoretically still schedule a work order of 1,5 hours for example.
We have done it like this because otherwise it would not be practical to schedule until the maximum capacity. In the above example you would only be able to schedule a work order of 30 minutes. And that makes planning much too difficult. We have chosen to still be able to schedule the longer work order. It is the responsibility of the planner to decide whether the work order will not go too far over the maximum capacity.
When you are using the appointment confirmation e-mail function of Plan-IT, since version 5.171.7825 (january 2017) it is possible to send a agenda item along.
How to turn this on
- In the menubar, click on the option System.
- Select the option System settings.
- In the first row of tabs, go to Connections.
- Then to go Mail in the second row of tabs.
- Turn on the option Send agenda item with appointment confirmation.

The last step is to go to the Plan-IT folder and create (or let your system administrator create it) an extra folder with the name Export. Sending the agenda item does not work when the Export folder does not exist.
After the above settings have been configured, a agenda item is automatically sent with every appointment confirmation e-mail.
Plan-IT has the option to send appointment confirmations to customers per e-mail. Follow the below steps to enable this:
- Click in the menubar on the option System.
- Select the option System settings.
- Click on the tab Connections.
- Go in the second row of tabs to Mail.
- First enter the mailserver details in the Mail server tab to be able to send e-mails from Plan-IT.

- Then go to the Service appointment confirmation tab and turn on the checkbox option Service appointment conformation by mail.
- Click on the Save button to apply the changes.

Plan-IT is now correctly set up to send appointment confirmation e-mails to customers. However, there are 4 different types of confirmations, that vary in complexity and customization options. Below follows a descroption for each type:
1 – basic appointment confirmation
With the above steps, you have set up Plan-IT for sending the most basic version of an appointment confirmation e-mail. To do this, click with the right mouse button on a work order, and select the option Service appointment confirmation.

An e-mail is sent to the e-mail address that is entered in the work order, with in the subject the company name, the registration number of the car of the customer, and the date on which the work order is scheduled. In the text of the e-mail, the date on which the car is scheduled is mentioned again, and wether the customer wants to make use of replacement transport.
2 – basic appointment confirmation with custom text
Follow the below steps to edit the standard text from the e-mail:
- Click in the menubar on the option System.
- Select the option Service appointment confirmation text.
- In the top of the window, turn on the option Use this text on service appointment confirmations.
- In the remaining fields, you can edit the texts.
3 – e-mail with layout
Appointment confirmations that are sent in the above way, do not contain a layout. You can create and use your own layout for the appointment confirmations that are sent from Plan-IT. An example of a layout is located in the folder Plan-IT∖Data∖Sjabloon.html.
To use your own layout, create a new file in the folder Plan-IT∖Data with the name Afspraakbevestiging.html. To get the text from Plan-IT in the template, use the tag <%body%>. Plan-IT replaces this tag automatically with the text that is entered in Plan-IT or the default text for the appointment confirmation.
To add images in the e-mail template of the appointment confirmation, you can use links to your website. It is advisable to submit this html template to your webdesigner so they can create the preferred layout.
4 – most extensive appointment confirmation
Since version 5.171.8700 of Plan-IT, you can create a fully customizable appointment confirmation.
Follow the below steps to turn on this functionality:
- Click in the menuar on the option System.
- Select the option System settings.
- Click on the tab Connections.
- Go in the second row of tabs to Mail.
- In the third row of tabs, go to Service appointment confirmation.
- Turn on the option Use a custom HTML Template for appointment confirmation.

Then create a file with the name Appointment_confirmation.html and place it in the folder Plan-IT∖Data. This template can then be used by all establishments.
Make sure that the file Appointment_confirmation.html has exactly the correct name and is placed in the correct location when you activate the option Use a custom HTML template.
When the option is activated and Plan-IT can not find a file named Appointment_confirmation.html, an empty e-mail without any content is sent to the customer!
Multiple establishments
you can create an individual layout for each establishment. The Afspraakbevestiging.html should then not be placed in the Plan-IT∖Data folder, but in the folder of the establishment. So for example Plan-IT∖Data∖1.
Follow the below steps to find out which folder is for which establishment:
- Click in the menubar on the option System.
- Select the option Management.
- Click with the left mouse button on an establishment to select it.
- Then click with the right mouse button on the establishmentand select the option Edit.
- The Edit establishment window is opened with the number of the folder that belongs to the establishment in the Data directory field in the bottom left corner.

Tags
There are several triggers (tags) that you can include in the Appointment_confirmation.html, which Plan-IT will replace with the correct information from the work order. There are also several tags that will show or hide sentences in certain circumstances.
The below overview shows all possible tags and how these will be filled by Plan-IT:
| [establishment] | This tag will be replaced by Plan-IT with the comapny name that is entered in the mail module in the system settings. |
| [establishment_address] | This tag will be replaced by Plan-IT with the streetname of the comapny name that is entered in the mail module in the system settings. |
| [establishment_postalcode] | This tag will be replaced by Plan-IT with the postal codeof the comapny name that is entered in the mail module in the system settings. |
| [establishment_city] | This tag will be replaced by Plan-IT with the city of the comapny name that is entered in the mail module in the system settings. |
| [establishment_phone] | This tag will be replaced by Plan-IT with the phone number of the comapny name that is entered in the mail module in the system settings. |
| [establishment_email] | This tag will be replaced by Plan-IT with the e-mail address of the comapny name that is entered in the mail module in the system settings. |
| [salutation] | This tag will be replaced by Plan-IT with the salutation of the customer. Only use this tag when you are sure that the salutations are entered correctly in Plan-IT. |
| [name] | This tag will be replaced by Plan-IT with the customer name. |
| [make] | This tag will be replaced by Plan-IT with the brand of the car of the customer. |
| [licenseplate] | This tag will be replaced by Plan-IT with the registration number of the car of the customer. |
| [date] | This tag will be replaced by Plan-IT with the date on which the work order starts, unless there is a time appointment, then the date of the delivery of the time appointment is used. |
| [enddate] | This tag will be replaced by Plan-IT with the date on which the work order ends, unless there is a time appointment, then the date of the collection of the time appointment is used. |
| [starttime] | This tag will be replaced by Plan-IT with the starting time that is entered in the system settings of the replacement transport (the opening time of the establishment). When the customer wait option is turned on, the waiting time is used. When there is a time appointment, the delivery time is used. |
| [endtime] | This tag will be replaced by Plan-IT with the end time that is entered in the system settings of the replacement transport (the opening time of the establishment). When there is a deadline, that time is used here. When it is a time appointment, the collection time with be used. |
| [closingtime] | This tag will be replaced by Plan-IT with the closing time workday that is configured in the company details in the Mail tab in the System settings. |
| [cust_return_date] | This tag will be replaced by Plan-IT with the date in the work order on which the customer will be returned. |
| [cust_return_time] | This tag will be replaced by Plan-IT with the time in the work order on which the customer will be returned. |
| [cust_collect_date] | This tag will be replaced by Plan-IT with the date in the work order on which the customer will be picked up. |
| [cust_collect_time] | This tag will be replaced by Plan-IT with the time in the work order on which the customer will be picked up. |
| [car_collect_date] | This tag will be replaced by Plan-IT with the date in the work order on which the car will be picked up. |
| [car_collect_time] | This tag will be replaced by Plan-IT with the time in the work order on which the car will be picked up. |
| [car_return_date] | This tag will be replaced by Plan-IT with the date in the work order on which the car will be returned. |
| [car_return_time] | This tag will be replaced by Plan-IT with the time in the work order on which the car will be returned. |
| [rc_yes/no] | This tag will be replaced by Plan-IT with Yes or No, depending on if replacement transport is selected in the work order. |
| [rc_type] | This tag will be replaced by Plan-IT with the type of replacement transport that is selected in Plan-IT. |
| [waits_yes/no] | This tag will be replaced by Plan-IT with Yes or No, depending on if the customer waits option is turned on. |
| [price] | This tag will be replaced by Plan-IT with the price of the fixed price agreement if that is entered in the work order. |
| [reception_name] | This tag will be replaced by Plan-IT with the full name of the receptionist that has created the work order. |
| [reception_function] | This tag will be replaced by Plan-IT with the function of the receptionist that has created the work order. |
| [reception_telephone] | This tag will be replaced by Plan-IT with the phone number of the receptionist that has created the work order. |
| [reception_email] | This tag will be replaced by Plan-IT with het e-mail address of the receptionist that has created the work order. |
| [job] | This tag will be replaced by Plan-IT with the main operation in the work order. |
| [added_text] | Extra text can be added to each appointment confirmation to personalise the e-mail. This tag is then replaced with the text entered by you. This option needs to be turned on in the systemsettings. This is the checkbox Free text can be added. |
All tags are optional. So you can decide for yourself which tags to use or not to use.
In addition, you ca also hide and show sentences.
Put one of the below tags in front of a sentence, on the same line, to either show or hide the sentence under certain circumstances.
Use one of the below tags for that:
| {not_return_collect} | The sentence behind this tag will be left from the appointment confirmation when the collect and deliver option is turned on in the work order. |
| {not_return_collect_waits} | The sentence behind this tag will be left from the appointment confirmation when the collect, deliver, or customer waits option is turned on in the work order. |
| {not_car_collect} | The sentence behind this tag will be left from the appointment confirmation when the collect car option is turned on in the work order. |
| {not_return_collect_waits_timeappointment} | The sentence behind this tag will be left from the appointment confirmation when the collect, deliver, customer waits, or time appointment option is turned on in the work order. |
| {timeappointment} | The sentence behind this tag will be added to the appointment confirmation when the time appointment option is turned on in the work order. |
| {waits} | The sentence behind this tag will be added to the appointment confirmation when the customer waits option is turned on in the work order. |
| {not_waits} | The sentence behind this tag will be left from the appointment confirmation when the customer waits option is turned on in the work order. |
| {cust_return} | The sentence behind this tag will be added to the appointment confirmation when the Company returns customer option is turned on in the work order. |
| {cust_collect} | The sentence behind this tag will be added to the appointment confirmation when the Company collects customer option is turned on in the work order. |
| {car_collect} | The sentence behind this tag will be added to the appointment confirmation when the Company collects vehicle option is turned on in the work order. |
| {car_return} | The sentence behind this tag will be added to the appointment confirmation when the Company returns vehicle option is turned on in the work order. |
| {price} | The sentence behind this tag will be added to the appointment confirmation when a price is entered with the Estimate option in the work order (price greater than 0). |
| {mot} | The sentence behind this tag will be added to the appointment confirmation when the MOT option is turned on in the work order. |
| {tyrechange} | The sentence behind this tag will be added to the appointment confirmation when the Change tyres option is turned on in the work order. |
| {rc_yes} | The sentence behind this tag will be added to the appointment confirmation when the Replacement car option is turned on in the work order. |
| {rc_no} | The sentence behind this tag will be added from the appointment confirmation when the Replacement car option is turned off in the work order. |
| {rc_no_notwaits} | The sentence behind this tag will be added from the appointment confirmation when the Replacement car option and the customer waits option are both turned off in the work order. |
| {rc_car} | The sentence behind this tag will be added to the appointment confirmation when the selected Replacement car option in the work order is a car. |
| {rc_bike} | The sentence behind this tag will be added to the appointment confirmation when the selected Replacement car option in the work order is a bike. |
| {fastlane} | The sentence behind this tag will be added to the appointment confirmation when the Fastlane option is turned on in the work order. |
| {diagnostics} | The sentence behind this tag will be added to the appointment confirmation when the Diagnostics option is turned on in the work order. |
All tags are optional. So you can decide for yourself which tags to use or not to use.
The below example shows how the layout of the Appointment_confirmation.html file can be composed:
Dear [salutation] [name],Hereby we confirm the workshop appointment made by you for a [job] for your [make] with registration number [licenseplate].{not_car_collect}You will bring the car at [date] to our establishment [establishment].{not_waits}Your appointment is scheduled at [starttime]. We would appreciate it if you can bring your car 15 minutes prior. The mechanic can then start on your car at the scheduled time.{waits}Your appointment is scheduled at [starttime]. You will be waiting until the car is ready.{not_waits}Ultimately at [endtime] your car will be ready in our workshop. In case your car is finished sooner, we will inform you timely.You will be using replacement transport: [rc_yes/no] [rc_type]{cust_return}After you have delivered your car, we will be bringing you back home.{cust_collect}At the end of the day we will come pick you up again.{car_collect}We will be collecting your car in the morning. Our driver will contact you to make a time appointment.{car_return}At the end of the day we will bring you back home.{price}We have a price appointment of € [price] for the appointment.[added_text]When you have questions or comments regarding your service appointment, please contact us via contact@plan-it.nl or 085 2362500.With kind regards,[reception_name][reception_function][reception_telephone][reception_email]
You can customize your own appointment confirmation entirely to your liking or let the layout be created by a webdesigner.
When you create a new establishment in Plan-IT, it can take a lot of time to add all operations. When you want to add the same operations in the new establichment as there are in an existing establishment, you can save much time by copying the operations of the existing establishment to the new establishment. This can be done with exporting-importing.
- In the bottom of the Plan-IT window, select the establishment from which you want to copy the operations.

- Then click in the menubar on the option File.
- Select the option Operation.
- Press the key combination Ctrl + E (export). An information window appears with the message that the operations are exported:

The operations are stored in a file with the name bewerkingen.csv.
- Now, in the bottom of the Plan-IT window, select the establishment to where you want to copy the exported operations.
- In the menubar, click on the option File and select the option Operations.
- Press the key combination Ctrl + I (import).
Another window appears informing that the operations that are stored in the file bewerkingen.csv are being imported. You might only see the window flashing by for just a very short time, because when there are only several operations (less than 50) the import will be very fast.

After this the operations are imported and you can select them in work orders.
Pay attention when importing operations to existing establishments. When you import operations with the same name as existing operations, Plan-IT will overwrite these. The color and operation time will then also be overwritten with what's in the file bewerkingen.csv!
As the end of the year approaches, many of our customers discover that there are no working hours available in the next year.
The planboard is then all grey and it is not possible to schedule work orders.

Follow the below steps to fill the planboard for the next year:
- Click in the menubar on the option File.
- Select the option Calendar.
The Calendar window appears with the current month.
- To copy the working hours from the current year to the next year, click with the right mouse button on the week number of a filled week.
- Select the option Copy.

- Navigate to the first month of the next year with the buttons in the bottom right corner.

- Now click with the right mouse button on the first week of the new year.
- When it is a broken week (part of the days are still in the current year) you select the option Paste.

- The first week is now filled with the working hours of the copied week.
- Then click with the right mouse button on the first week that falls entirely in the next year.
- Select the option Paste special.

A pop-up message appears that the copied week will be copied repeatedly to the end of the year.
- Click on the Yes button to confirm.

The whole year is now filled for the first employee.
- To fill the calendar of the other employees with the same working hours, click with the right mouse button on the year in the top left corner.
- Select the option Copy.

The whole year is now copied.
- Select another employee in the dropdown menu in the bottom left corner.

The calendar of the selected employee is now shown.
- Click with the right mouse button on the year again in the top left corner.
- Select the option Paste all employees.

A pop-up message appears that the copied year will be pasted to the next year for all empoyees.
- Click on the Yes button to confirm.

A window appears now in which Plan-IT copies the calendar to all employees. Wait for this window to disappear again.

- In the bottom right corner , click on the Close button to close the calendar window.
When you have configured an online module in Plan-IT, a pop-up window appears with the question if you want to send the edited working hours to the online module.
- Click on the Yes button to confirm (otherwise the online module will keep working with the old working hours where the next year is still empty, and customers will not be able to schedule appointment requests for the next year through the online planner).

Now work orders can be scheduled in the next year.

When you add a new employees in Plan-IT, they do not yet have working hours on the planboard. Follow the below steps to add working hours on which work orders can be scheduled:
Opening the calendar
You add working hours in Plan-IT in the calendars of employees. Follow the below steps to open the calendar:
- Click in the menubar on the option File.
- Select the option Calendar. The Calendar window appears:

In the bottom of this window is a field to select another employee, and buttons to navigate to another month or year.
Below is a description for several different ways to add working hours:
Copy working hours
The easiest way to add working hours for a new employee is to copy these from an existing employee:
- In the bottom left corner of the Calendar window, in the Employee field, select the employee from which you want to copy the working hours.

- Click with the right mouse button on a day you want to copy.
- Select the option Copy.

- Then select the new employee to which you want to copy the copied day in the Employee field in the bottom left corner.
- Click with the right mouse button on an empty day where you want to paste the copied day and select the Paste option.

Fill a year
You can also fill a new year all at once. Follow the below steps for that:
- In the calendar window, click with the right mouse button on a week number and select the Copy option.
- Navigate to the first month of the new year with the buttons below the calendar.
- Click with the right mouse button on the first week of the new year and select the Paste special option.
- A pop-up window appears with the message that you will copy the week repeatedly to the end of the year. Click on the Yes button to confirm this.

Add new working hours
When there are no other employees available in Plan-IT with working hours, or when you want to give the new employee other working hours, you can add new working hours:
- In the Calendar window with the new employee selected, click with the right mouse button on an empty day..
- Select the option Add.

The Adapt working time window appears:

The name of the employee and the date are automatically filled in.
- Enter a Starting time and End time. Keep the break times in mind here. For example, when the employee has a break from 10:00 until 10:15 then enter the starting time of the working day until the first break (for example from 8:00 until 10:00).
- Then click on the Save button.
The first block of working time appears in the Calendar window.

- Again click with the right mouse button on the same day and select the option Add once more.
- Enter the second time slow (for example from 10:15 until 12:30) and click on the Save button again.
- Fill the entire first day this way.

Now you can copy and paste the day as it is described previously on this page.
Follow the below steps to add a new user:
- Click in the menubar on the option File.
- Select the option Employee.
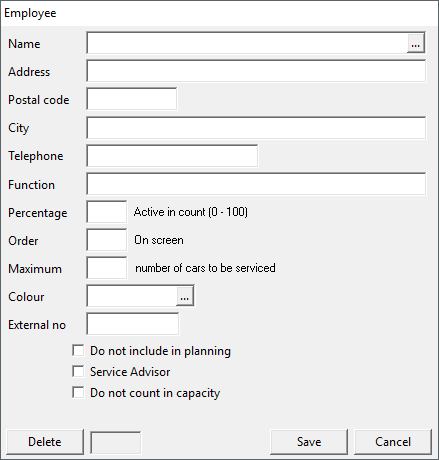
- In the Name field, enter the name of the employee. This name will be displayed on the planboard in the column with all employees.
- In the Functie field, enter what the function of the employee is, such as mechanic or service advisor. It will be displayed on the planboard below the name of the employee.
- In the Percentage active in count field, enter a number from 0 to 100 for how many percent the employee should count in the total planning. By setting this percentage to 90% for example, you keep 10% room in the planning for additional work, drop in customers, calamities etc.
- With the Order field, you can determine the order of the column with employees. This way you can put employees with the same function underneath each other.
- In the field Maximum number of cars to be serviced, you can set a maximum number of cars that the employee can service per day, to prevent that too many work orders are scheduled for the employee.
- In the field Color, you can link a color to the employee. The employee will then be shown in the selected color in the column left of the planning board. This way the various employees can be easily distinguished. Click the button to select a color for the employee and click the OK button. It is useful to give an employee the same color as the main operation they will be performing mostly.
- Turn on the option Do not include in planning to remove the employee from the employee column next to the planning board, but still counts for the days off planning. When you have an online module, this employee still counts for the online planning.maar telt wel mee met de vrije dagen planning, en ook in een eventuele online module.
- Turn on the option Service advisor when the employee can be scheduled as a service advisor.
- Turn on the option Do not count in capacity when the employee should not be included in the total capacity. The number of ae's (job units) in the bottom right corner of the employee will be set to 0 and does not decrease when a user schedules work orders on this employee.
When everything is filled in as preferred, click the Save button to add the employee in the system.
The window is emptied after clicking the save button to enter a new employee if preferred. Click the Cancel button when you are finished adding employees to close the window.
Edit employee
To edit the data of an existing employee:
- Click in the employee window in the Name field on the button to open a list of all entered employees.
- Click on an employee in the list to select it.
- Then click on the OK button to open the data of the selected employee.
You can now edit the preferred data. When you are finished, click the Save button to store the new data..
Delete employee
To delete an employee:
- First select the employee you want to delete.
- Click on the Delete button in the bottom left corner.
A window appears where you need to confirm that you want to delete the selected employee.

- Click on the Yes button to delete the selected employee from the system.
Keep in mind that you cannot delete an employee when there are still unfinished work orders scheduled on their name. If this is the case, an information window appears with the message that the employee cannot be deleted. First, move all unfinished work orders to other employees.

Since Plan-IT Workshop version 5.171.9700, it is possible to configure triggers, to make sure that when selecting certain operations in work orders, the option Internal order, MOT, or Change tyres is automatically turned on. This way you prevent that users accidently forget to turn on an option.
Follow the below steps to configure triggers:
- Click in the menubar on the option System.
- Select the option Management.
- Click with the right mouse button on the green PLAN-IT bar.
- Select the option Systemsettings.

- In the System window that appears, go to the tab Triggers.

- Then click on the button Add to create a new trigger.
The Triggers window appears:

- Select in the Establishment field whether you want to apply the trigger in all departments or only in a specific department.
- Then enter in the Trigger field what the work order should respond to. Enter the name of an operation or extra operation. By entering a part of a name you can have the work order respond to multiple operations with that part in the name.
- Finally select in the Type field which option in work orders dhould be checked on for this trigger.
In the below picture, an MOT trigger is added as example, with the name MOT, for all departments:

When you now select an operation or extra operation in a work order with the word MOT in its name, it will automatically put a check in the box for the MOT option.

It is possible to import employees in Plan-IT. You can use this for example when you are a new Plan-IT user, have many establishments, and you don't want to enter all employees by hand in Plan-IT.
Create a .CSV file in which you enter all employees. Give the file the following layout:
| WERKNEMERNR | VESTIGING | NAAM | WOONPLAATS | FUNCTIE | PERCENTAGE | VOLGORDE | MAXDOORGANG | KLEURCODE | EXTERNNR |
|---|---|---|---|---|---|---|---|---|---|
| 1000207 | Plan-IT International | Jan de Jong | Venray | Airco | 85 | 6 | 10 | 5460904 | JDJ |
| 1000477 | Plan-IT International | Willem de Vries | Venray | Diagnose | 85 | 7 | 10 | 7961021 | WDV |
Explanation of the fields:
| WerknemerNr: | is the number that you use for the employee. Can also be the external number of the employee, does not actually matter. It does need to exist in this format, but we do not do anything with it. As long as it is a unique number. |
| Vestiging: | this is the name of what the establishment is called in Plan-IT. With this name we will search in Plan-IT in which establsihment the employee needs to be added. |
| Naam: | is the name of the employee that will be displayed in Plan-IT. |
| Woonplaats: | place of residence of the employee. |
| Functie: | is the function that will be displayed in Plan-IT. |
| Percentage: | is the percentage that you want the employee to be active in the planning. When you don't know the percentage we advise to keep it at 90% or 100%. |
| Volgorde: | this is the order in which the employees are sorted. When you enter this properly you can group employees with similar specialities. You can edit the order later in Plan-IT if needed. |
| MaxDoorgang: | this is a value that you will see below the planboard. You can enter a 0 when you don't want a limit om the maximum number of cars to be serviced. |
| KleurCode: | this is the color that the employee will be displayed in on the planboard. We usually advise to use the color of the operation they will be doing the most. For easy recognizability, try to keep it the same color in all establishments. |
| ExternNr: | this is the code that is used in Autoline for the employees.It is important because it is used to connect the calendar and days off from Autoline to Plan-IT. So make sure it is correctly entered. |
When the .CSV file is completely entered, start the program Import_Werknemers.exe which you can find in the Programs folders.

Click on the button inthe Datapad import csv field to select the file with all the employee data, and click on the Importeren button.
Management module
To configure this, go to the management module:
- In the menubar, click on the option System.
- Select the option Management.
- Click with the right mouse button on the green Plan-IT bar.
- Select the option Systemsettings.
- Go to the tab User +.
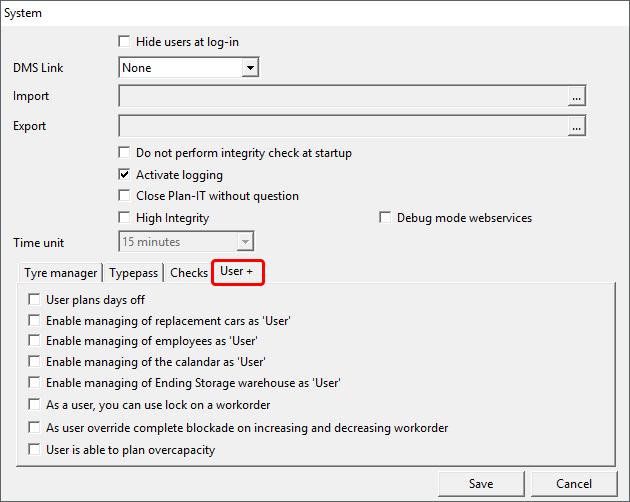
Here you can turn on the options that you want to give to the user+ rights level. You can entirely configure this yourself. This gives the possibility to have a user manage employees for example without needing administrator rights.
When this is done, you can give the users User+ rights individually in each establishment:
- In the Management module, click with the left mouse button on an establishment.
- All users are displayed now, and you can see what rights they have in the selected establishment. Click with the right mouse button on a user to change the rights level.
- In the contextmenu that appears, select the option (U+) User +.

Follow the below steps to add another user to Plan-IT:
- Click in the menubar on the option System.
- Select the option Management.
- In the window that opens, click with the right mouse button on the green Plan-IT bar.
- Select the option Add user.

The following window appears:

- In the field Login, type the name that you want to give the user. This is the username that the user will have to enter in the login screen.
- In the Password field, type the paddword for the user.
- When everything has been entered properly, click on the Save button.
Give user rights
After creating a new user, it will be shown in all establishments and brands, but by default it is set to Not visible everywhere. The user first has to receive rights to be able to view details or perform actions in an establichment or brand.
There are several different rights levels, and only a user with Master rights can change the rights of other users.
Click in the Management window on the establichment or brand in which you want to give the new user rights.
A list appears with all users underneath each other. The colors and the letter in the bottom right corner of the user button give an indication which rights they currently have.
he following rights profiles exist in Plan-IT Workshop:
this user can login, but only view data (color is orange and there is a V in the bottom right corner).
| Not visible: | this user cannot login to this establishment (color is grey and there is an N in the bottom right corner). |
| View: | this user can login, but only view data (color is orange and there is a V in the bottom right corner). |
| User: | can create, edit and delete work orders. There are no rights to edit base settings and system settings (color is green and there is a U in the bottom right corner). |
| User +: | this user has the same rights as a regular user but there are additional rights that can be turned on in the System settings for this account type (color is light green and there is a U+ in the bottom right corner). |
| Administrator: | has rights to change/add base setting but has no access to the Management section (color is red and there is an A in the bottom right corner). |
| Master: | has all rights within an establishment as well as access to the Management section (color is yellow/green and there is an M in the bottom right corner). |
| Default establichment: | this option will let the user start in this establishment directly after logging in (a D will appear in the top left corner of the user button). When no default establishment is selected, then Plan-IT will start with the first active establishment where the user has rights. |
To give a user rights in the selected establishment or brand, click with the right mouse button on a user and in the contect menu select the preferred rights profile. In each establishment or brand, a different rights profile can be selected for the same user.

Edit or delete a user
To edit the data of a user, click on the User button in the bottom right corner of the management window to switch to the user section. Instead of the establishments and brands, now the users are listed in the top of the window.
By clicking with the left mouse button on a user, you can see which rights they have in each establishment. Click with the right mouse button on a user and select the option Edit user in the contect menu to edit the data.
You can also delete a user from the user section by clicking with the right mouse button on a user and selecting the option Delete user.
When you prefer not having to enter your user name and password each time when you log in, you can save these in the shortcut of Plan-IT.
To do that, click with the right mouse button on the shortcut and select the option Properties in the context menu that appears.

Then click on the tab Shortcut in the top of the window that appears.
To login automatically in Plan-IT Workshop, type your user name and password in the Target field, behind the text that is already entered there. First type a space and then your user name in capitals. When your user name consists of multiple words, put it between two quotation marks. Then type another space followed by your password in capitals.
Click the OK button and the entered data is saved.

When you now start Plan-IT by double clicking on the Plan-IT icon, Plan-IT will start without asking a username and password.
Important: Keep in mind that other people can now also login with your credentials by double clicking this shortcut, or even look up your password by going to the properties of the shortcut.
You can turn off the automatic logging in again by removing the username and password from the Target field.
Moving Plan-IT to another server is very easy. You just copy the Plan-IT folder on the current location to the new location. Then you update all shortcuts to the new location and Plan-IT is moved.
After that is done, start Plan-IT (on every workstation or every Terminal Server) one time by clicking on the Plan-IT icon with the right mouse button, and select the option Run as Administrator from the context menu that appears.
There is however 1 boundary condition:
You need to have a recent installation of Plan-IT. You can check this by looking in the Programs folder to see if there is a VDFDaemon.exe file present:

When you find this file in the folder, then you can perform the move.
When this file does not exist, please contact us so that we can assist you with the migration. You can reach us per phone via the number 0031 478-585457.
In all our Plan-IT products is an update procedure. To be able to use this, you will need administrator rights in Plan-IT and on your network.
Attention: some antivirusscanners or firewalls block access to the Plan-IT update server. When the update program indicates that no new version can be found, while our website mentions a newer version in the news, please contact your system administrator and let them check whether the firewall or the antivirusscanner blocks something.
Preparatons
Before you can begin with the update, all users from all establishments need to close Plan-IT. You also need to stop all background tasks that are connected with Plan-IT. Think of the Autoline ODBC connection, Incadea statuses program, Plan-IT Export program, Plan-IT Welcome, Plan-IT Import program or external applications that are connected to Plan-IT via ODBC.
We also advise to make a back-up of your Plan-IT program before you begin with updating. You can do this by making a copy of the Plan-IT folder on the server. You can then quickly go back to the pervious version at any time in case something goes wrong. This way you can also check if there is still someone in Plan-IT, because you can only make a copy when there's nobody logged in.
Performing the update
- Start Plan-IT on 1 workplace and log in with an account that has Administrator rights.
- Click in the menubar on the option System.
- Select the option Check for new version.
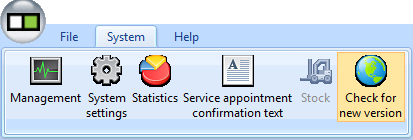
Plan-IT closes itself and the update program is started.

- Click on the Start button to let the update program search for updates. When a new version is available the program will indicate this.

- Click on the Yes button to download the update.

- Click on the OK button to close the update window.
When the update is finished, Plan-IT needs to perform a database update. To do this, start Plan-IT again with the option Run as Administrator.

The database update can take a while. How fast the update is performed depends on your network speed and the number os establishments. Do not close this (even when it seems that Plan-IT is not doing anything, it can take a while before Plan-IT has finished the database update).
When you work with terminal servers, start Plan-IT on each terminal server once with the option Run as Administrator.
When the update is finished, all users can start Plan-IT again.
Version
On this website you can check the product page to see what is the most recent version of Plan-IT.
When the update program states that there is no newer version available and the website shows a more recent version, you might need to clear the cache of Internet Explorer (clear browser cache).
When you still have an older version of Plan-IT (v4.100.xxx) then contact us (contact@plan-it.nl) so we can assist you with installing the most recent version.
In Plan-IT version 5.171.8740, a work order can sometimes get stretched over the entire planboard and cannot be selected anymore.
Follow the below steps to solve this:
- Go to the day where the stretched work order is located.
- Click below the planbord on the button Overview.

- You will see a window with all work orders of the selected day. Search in the Time column for the work order that has 18 as end time.

- click with the right mouse button on line of work order and select option Work order to open it.
- The work order is now opened. Correct the time in the End time field.

- Click on the Save button.
- Click on the Close button in the overview window to return to the planboard window.
- The planboard window can turn all grey. Click on the Refresh button then.

The stretched work order should now be correctly on the planboard. We have solved this problem. Check here for the instructions to install the most recent version of Plan-IT.
Sometimes a server crash or a network problem can corrupt the Plan-IT database. The reindex program that is provided with Plan-IT can fix these corruptions in most situations.
Close Plan-IT
Before you can start the reindex program, all users on all establishments need to close Plan-IT. You also need to close all connections with Plan-IT and the background tasks, like the Autoline ODBC connection, Incadea Statuses, Exports and Import tasks, etc. The Reindex program needs exclusive rightson the Plan-IT database.
Perform reindex
Follow below steps to start the program:
- Open a Windows Explorer window (Windows key + E).
- Navigate to the Plan-IT Programs folder.
- Double click on the reindex.exe file to start the program.

When you see the below error message, there are still users that have not closed Plan-IT yet or there are proceseses that keep Plan-IT files occupied:
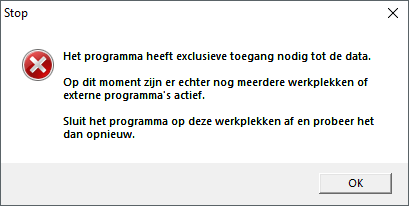
When the program does get all rights that it needs, you will see a window with all active establishments and a customer option:

When you have problems in a specific establishment, select it by clicking on it. The establishment turns blue. Then click on the Reindex button. All databases of this establishment are being checked. This can take a while!
The reindex program will automatically try to track and fix errors in the database. In most cases this will succeed. When everything went fine, you will see a message that the reindexing was finished succesfully:

Click on the OK button to close the window. You can now start Plan-IT again.
Not succesful
When the program can not solve the errors, you will see a message that bad records have been found. Please contact us if that is the case. We will perform the database repair for you then. You can reach us by phone via the number 0031 85 - 236 2500.
When you see this error message, Plan-IT cannot read a data file on the server.

This could be caused by a disrupted network connection or a session that has not been closed properly, and keeping files in use. In some cases, a datafile could be corrupted.
Perform below steps to solve the problem:
- Close Plan-IT and restart it again, abd test if the error has disappeared.
- When the error message still occurs after restarting Plan-IT, let all users on the establishment where the error message is occuring restart Plan-IT.
Check with the 'open files' on the dataserver to make sure that there are no connections with the data folder anymore.(7 in the above example). Close any connections that still remain.

- Is the error message occurring on a specific terminal server? Then restart that server.
- Perform a reindex on the establishment.
Perform Reindex
To perform a reindex on the establishment on which the error message is occurring, you first need to find out what establishment it is about (what is establishment 7 in the above example).
- Click in the menubar of Plan-IT on the option System.
- Select the option Management.
- Click with the left mouse button on an establishment to select it, and then click with the right mouse button and select the option Edit.
- In the bottom left corner in each establishment window is the Data Directory field with a number. Search for the establishment with the number that is mentioned in the error message.

Now that you know what establishment is causing the error, you can use the reindex program.
Since Plan-IT version 5.171.7825 (january 2017) it is possible to limit the maximum number of customers waiting that can make an appointment online. This is fully linked between Plan-IT Workshop and Plan-IT Online.
This option works wih the On Time module and the On Date module. The only difference is that the Plan-IT Online on Time module also checks for the customer waits appointments that are scheduld in Plan-IT Workshop, and the Plan-IT Online on Date module only checks the customer waits appointments that have been scheduled online. This is because it is not possible for the On Date module to keep an account of the customer waits appointments from Plan-IT Workshop.
Configure maximum number of customers waiting
You don't have to configure anything in Plan-IT Workshop. When you turn on the customer waits option in a work order, Plan-IT will automatically send this information to the online module. The online module then shows the available times, depending on how many customers waiting are already scheduled and the maximum number of customers waiting configured in the online module settings.
You can turn on this option in the management window of the Online module. Go to the Settings section:

You can also configure here what the maximum number of customers waiting is that you want to have at the same time. This is a global setting. When you enter 2 here, it means that there can never be more than 2 customers waiting scheduled at the same time.
When you want more flexibility, there is the possibility to configure how many customers waiting you want to have for certain times. You can do this in the Waiting times section:

For example, you can configure that you want no more than 3 customers waiting at 8:00 and no more than 2 on 10:15 and 13:00. All other times are not available for customers waiting. You can configure this completely to your preference.
With the checkboxes to the right of the configured times, you can also indicate for which days you want the specific waiting time to be available.
It is very important to know that the times you enter here actually exist in the online module.These are the blocks of working times that are configured in the calendars of the employees in Plan-IT Workshop. You can check what times you can configure by making a test appointment in the online planner and looking what the times are in the dropdown list.These are the times from which you can choose to configure configure as a waiting time.
The last step is create an activity(Checkbox) and turn on the Waits option, to indicate that this operation should be considered as a customer waits option. This means that when the customer selects this activity, Plan-IT Online will only show the waiting times instead of the regular times.

Make sure that the Visible and Waits options are checked, All groups is selected under the Groups option, and the Number of units field is empty.
The time duration of activities in Plan-IT is calculated through LU's: labor units. However Plan-IT Workshop handles LU's different than Plan-IT Online on time. On this page we will explain the differences.
LU's in Plan-IT Workshop
The time duration of an LU in Plan-IT Workshop is by default 15 minutes. These LU's are used to determine the time duration of work orders. When you configure an operation time for every operation (and extra operation) in Plan-IT Worjshop, Plan-IT Workshop will add the times of the operation and extra operations in a work order and enters the ens time based on this.
Follow the below steps to configure the operation time of operations:
- Click in the menubar on the option File.
- Select the option Operation.
- Create a new operation or click on the button to select an existing operation.
- Enter in the Operation time field how many quarters of an hour the selected operation should take.
- Click on the Save button to apply the entered operation time.

When you make a new work order now, and you select an operation that has the operation time entered, Plan-IT Workshop will add the operation time to the Starting time and enters the calculated time in the End time field.
DMS
When importing work orders from a DMS, Plan-IT Workshop takes over the time duration of work orders that is entered in the DMS, and converts the time duration to time units of 15 minutes. Set the operation time of the operations in Plan-IT Workshop to 0 when you use a DMS, otherwise the configured operation time will be added to the time duration that is taken over from the DMS.
Available LU's
Plan-IT shows the LU's that are still available with an employee in a yellow label in the bottom right corner, in units of 15 minutes.

You can activate an option to view the LU's in hours, when you think that's more convenient:
- Click in the menubar on the option System.
- Select the option System settings.
- Put a check in the box with the option LU in Hours.

The LU's will then be shown as such:

Plan-IT keeps counting with LU's of 15 minutes. This setting only affects how the availale time of employees is shown.
LU's in Plan-IT Online on time
Plan-IT Online on time also uses LU's, but in a different way than Plan-IT Workshop. You connect groups to each operation in Plan-IT Online on time, and you determine how many LU's the operation should take.

You determine how much time an LU in Plan-IT Online on time is by configuring the size of the blocks in the calendar of the employees in Plan-IT Workshop that have the same groups configured.
When you want to work with LU's of 15 minutes in Plan-IT Online on time as well, you create blocks of 15 minutes in the calendars of all employees that you want to have available for online appointments. However we advise to make the blocks as big as possible. Because the more blocks there are on a day, the longer it takes to send the calendar over to the online module when you change sometimes in the working hours or the occupation of employees.
| LU's of 15 minutes: | LU's of 30 minutes: | LU's of 1 hour: | LU's of 2 hours: | |||
 |
 |
 |
 |
|||
| 32 blocks of working hours | 16 blocks of working hours | 8 blocks of working hours | 4 blocks of working hours |
By making the blocks of working hours 30 minutes instead of 15 minutes, sending over the capacity will be twice as fast, because only half of the amount of blocks have to be sent over each day.
Make sure to keep the blocks of working hours the same size everywhere, because Plan-IT does not check how much time the blocks of working hours take in PLan-IT Workshop, but creates a reservation for the total number of LU's for the operations that customers have selected.
When you have the online module connected to Plan-IT Workshop, it is important that they remain synchronized. There can be various reasons why shows a deviating capacity.
The settings for the Plan-IT Online on date module are different than for the on time module.
On date
Do you have a Plan-IT Online on date module? Then check the folllowing steps:
Step 1: Initialise capacity online
The first step that we advise is to always first resend the capacity from Plan-IT Werkplaats again:
- Click in the menubar on the option System.
- Select the option System settings.
- Go to the Connections tab and in the second row of tabs, go to Online module.
- Click in the top right corner of the window where you are now on the Initialise capacity online button.

It can take some time to send all data. Check afterwards if the online capacity is in sync now.
Step 2: Check capacity
Check what the online module receives as capacity by clicking the Capacity button in the bottom of the planboard window.

A window appears with the capacity of all employees. The columns in the days show how many percent of the day is occupied.
When the online module shows a day as full, the same day should also be full in this window.
Info: The on date module does not consider a reservation as occupied space on the planboard. After all, there is still no definitive work order. When you want to plan a certain spot on the panboard as reserved while there is no work order, click with the right mouse button on the planboard and select the option Part of the day Off from the context menu.
Step 3: Employee details
When you add a new employee and you enter nothing in the field Percentage active in count, this setting will be set to 0% by default. Check the percentage of an employee:
- Click in the menubar on the option File.
- Select the option Employee.

- Click on the button to select an employee.
- Check in the Percentage active in count field if the correct percentage is entered.
- Also check if the Do not count in capacity option is turned on. Because the employee will then not be included in the planningfor the online module.
- Click on the Save button when you have corrected all settings.
When you jut made changes to the settings, then resend the capacity to apply the changes to the online module. Check afterwards if the online capacity is in sync now.
Step 4: Online module settings
Check on the Plan-IT Online management page if the percentage full is correctly set.
- Go to the website http://www.plan-it-online.nl/planitonline and log in with your account credentials.
- Select the correct establishment in the top left corner.
- In the left column, click on the Settings option.
- Check the percentage that is entered in the Percentage full option.
- Also check the setting in the Number of days unavailable option.
- Click in the bottom right corner on the Save button when you have changed any settings.

On time
Do you have a Plan-IT Online on time module? Then check the following steps:
Step 1: Initialise capacity online
The first step that we advise is to always first resend the capacity from Plan-IT Werkplaats again:
- Click in the menubar on the option System.
- Select the option System settings.
- Go to the Connections tab and in the second row of tabs, go to Online module.
- Click in the top right corner of the window where you are now on the Initialise capacity online button.

It can take some time to send all data. Check afterwards if the online capacity is in sync now.
Step 2: Check the calendar
Are all employees set available for the online module? In the calendar of an employee, white blocks of worktime are not visible for the online on time module, only the yellow colored blocks are received.

Follow the below steps to make a block of worktime online available:
- Click in the menubar on the option File.
- Select the option Calendar.
- In the bottom of the window, select the preferred employee in the dropdown list.
- Click with the right mouse button on a block worktime.
- Select the Edit option.
- Put a check in the Display block online option.
- Click on the Save button.

Step 3: Employee details
When you add a new employee and you enter nothing in the field Percentage active in count, this setting will be set to 0% by default. Check the percentage of an employee:
- Click in the menubar on the option File.
- Select the option Employee.

- Click on the button to select an employee.
- Check in the Percentage active in count field if the correct percentage is entered.
- Also check if the Do not count in capacity option is turned on. Because the employee will then not be included in the planningfor the online module.
- Lastly, check in the bottom right if the Groups are set correctly.
- Click on the Save button when you have corrected any settings.
When you jut made changes to the settings, then resend the capacity to apply the changes to the online module. Check afterwards if the online capacity is in sync now.
Step 4: online module settings
Check on the Plan-IT Online management page if the percentage full is correctly set.
- Go to the website http://www.plan-it-online.nl/planitonline and log in with your account credentials.
- Select the correct establishment in the top left corner.
- In the left column, click on the Settings option.
- Check if the Activate percentage full option it turned on.
- Check the percentage that is entered in the Percentage full option.
- Also check the setting in the Number of days unavailable option.
- Click in the bottom right corner on the Save button when you have changed any settings.

Follow below steps to configure Plan-IT Online on time properly:
- Go to the website https://www.plan-it-online.nl and log in with your credentials.
- In the top left corner, select the establishment that you want to configure:

After selecting the establishment, create the groups. Plan-IT Workshop uses these groups to link specific employees to the operations of Plan-IT Online on time.
- In the menu to the left, go to the option Werkzaamheden (operations).

- On the page go to the very bottom to create the groups.

To create more groups when all fields are filled, click on the Opslaan (Save) button. After the webpage is refreshed, a new empty field is added beneath the entered groups. Repeat this until you have added all groups that you want.
After creating the groups, go to the top of the page to create the operations. There are two types of operations: main operations (Radiobutton) and extra operations (Checkbox).
Specify for each operation to which Group you want to link it, or leave the field to alle bewerkingen (all operations) when it can be performed by all employees.
Enter an amount of AE (job units) to specify how much time is needed for an operation. Based on the specified AEs, Plan-IT Workshop checks where the planning has capacity to schedule the operations.

Configuring the workshop
Go to Plan-IT Workshop to configure the connection with the online module, to enable the online module to read the capacity of the planning board.
- In the menubar, click on the option System.
- Select the option Settings.
- In the first row of tabs, go to Connections.
- Then go to Online module in the second row of tabs.
- In the field Online module, select the option Plan-IT Online.
- In the fields Log-in and Password, enter the credentials of the online establishment you want to make a connection with.
- Put a check in the box with the option Plan on time.

Click on the Save button in the bottom right corner when all data is entered. After saving, Plan-IT will show a pop-up window with a question of the capacity needs to be initialized. Click on the No button for now. This does not need to be sent over until after creating the calendar.
Link employees
- In the menubar, click on the option File.
- Select the option Employee.
- In the field Name, click the
 button to select an employee, and click on the OK button.
 - You can link a group to the employee as shown in the below picture:

- Click on the Save button to save the changes.
- Click on the Cancel button when you have linked the groups for all employees, to close the employee window.
When closing the window, Plan-IT will show a pop-up with the question to update the online modile. Click on the No button for now.

Create operations
When a customer makes an appointment online, Plan-IT Online will place a reservation on the planning board. You can give these reservations a specific color by creating operations with the exact same name as the operation in Plan-IT Online on time.
- In the menubar, click on the option File.
- Select the option Operation.
- The Operation window opens. In the Name field, enter the same name that you have entered in Plan-IT Online on time.
- In the field Color, select the color that you want to give reservations for this operation.

Create Calendar
Then create the calendar.
Choose a certain time duration for the AE (job unit) that you want to work with, for example 30 minutes. Blocks of 30 minutes will have to be created then (keeping breaks into account).
- In the menubar, click on the option File.
- Select the option Calendar.
- The Calendar window appears. Select the preferred employee in the bottom left corner.

Create the preferred schedule for the first day, in blocks of AE (job unit). In this example we create a schedule from 8:00 to 17:00 with a break between 12:30 and 13:00.
- Click with the right mouse button on a day and select the option Add.

- Enter the correct times in the fields Starting time and End time, in this example 8:00 and 8:30.
- Turn on the option Display block online.
- Then click on the Save button.

The first block is now added:

Repeat this until the day is fully filled. When you have done this, the calendar will look like this:

Now copy the filled day to the rest of the week. Click with the right mouse button on the filled dayand select the option Copy:

Then click with the right mouse button on the empty days in the same week and select the Paste option until the entire week is filled.

The filled week will now look like this:

Now copy the entire week by clicking with the right mouse button on the week number, and select the Copy option:

Now click with the right mouse button on the week number of an empty week, and select the Paste special option:

Your calendar will then look like this for the rest of the year:

In case you also want to fill the calendars of other eployees, select another employee in the Employee field in the bottom left corner. You can immediately use the Paste special option to paste the same copied week in the calendar of other employees until the end of the year.
When the calendars of all empoyees are filled, click on the Close button in the bottom right corner. A pop-up window appears asking if you want to update the online module. Now click the Yes button.

When the updating is finished, the employees with blocks of online working hours are available for online appointments. These will now be placed on the planning board as reservations.
With the daily planning, you can keep clockings of the operations that are being performed. With the clocking you will get a better insight in how much time an operation will actually take, and where it deviates from the earlier created planning, which will help schedule future operations more accurate.
Activate daily planning
Follow the below steps to activate the daily planning function:
- Click in the menubar on the option System.
- Select the option System settings.
- In the first row of tabs go to Settings.
- Then go to System in the second row of tabs.
- In the bottom of this window, put a check in the box with the option Daily planning.

Using daily planning
When you have activated the daily planning, in the menubar option File you will have the extra option Daily planning next to the option Planning board.

The Planning board window is used to make a planning of the work orders that need to be performed. The Daily planning window, which you can recognize by the blue color, is used to keep track of the actual performed operations. To the right is the Work stock column where all work orders appear that are scheduled on the current day in the planning board.

You place the work orders from the work stock column with a mechanic by clicking and dragging: navigate the mouse to the left side of a work order until the mouse pointer changes in a hand symbol. Click with the left mouse button and keep it pressed. Now move the mouse to the mechanic where you want to place the work order and let go of the left mouse button.
To move all work orders to the correct spot with the correct mechanic, you can also click the Planning overnemen button in the bottom of the daily planning window. This way, all work orders are placed how they are scheduled on the planning board with 1 click.
When a mechanic begins with the operations for a car, put the work order in the Daily planning window to the name of the mechanic. Then click with the right mouse button on the work order and select the option In progress. With this, you change the status of the work order to in progress and the clocking is activated and the time tracking starts.

When the mechanic has finished working on the car, click again with the right mouse button on the work order and select the option Mechanic finished. With this you change the status of the work order to mechanic finished and the time tracking stops.

You can select the status Work interrupted when the mechanic has to temporarily pause his work. The clocking stops and the remaining part of the work order moves along with the red line that represents the current time. The clocking will continue when you change the status to in progress again.

When the mechanic is working longer on a work order than initially scheduled, the part of the work order that takes longer will color red. This way you clearly see what operations take more time than what was scheduled previously.

View clockings
To view the clockings of a work order, click with the right mouse button on a work order in the planning board window and select the option SOLL/IST from the contextmenu that appears.

The Tijdregistratie overzicht window appears with the details of the clockings.

In the top part SOLL you can see the data how the work order was scheduled on the planning board.
In the bottom part IST are the data of the clockings.
By comparing these data you will gain insight how accurate the planning was and where there's room for improvement.
Display clockings on the plannig board
You can also activate an overview of the clockings on the planning board. Follow the below steps for that:
- Click in the menubar on the option System.
- Select the option System settings.
- In the first row of tabs go to Connections.
- Then go to Time management in the second row of tabs.
- Put a check in the box with the option Use Time management.

The clockings will now be shown in a bar underneath the work orders on the planning board. This bar starts at the moment when you put the status of a work order to In progress in the daily planning window, and follows the red timeline until you change the status of the work order to Mechanic finished.

When a customer makes an appointment online, a confirmation e-mail is sent to the customer, and another e-mail is sent to the workshop reception. With the Plan-IT Online on Time module, a reservation is placed on the planboard in Plan-IT Workshop as well, so no other work order can be made on the same time that the customer selected.
When you cannot find the reservation, or it seems to have disappeared, you can search for the reservation in the logging of Plan-IT Workshop (if it is turned on). Follow the below steps to do that.
- First click with the right mouse button on a random work order, and select the Logging option to open the logging window.

Read this page when the logging option is not listed in your context menu.
Plan-IT only starts keeping a log from the moment when the logging option is checked on. You cannot find back logging from the past when the logging was not activated yet.
The Logging window appears with the details of the work order that you clicked with the right mouse button. Here you can find when the work order was created, on what date and tme, with which employee, and by which Plan-IT user.
- In the top of the logging window, remove the number that is in the Work order field.
- Enter the registration number that belongs to the reservation that you are searching for, and press the Enter key.

Plan-IT shows the results in the logging window based on the entered registration number:

The events are shown in chronological order, with the oldest event on the bottom. In the above example, the reservation was removed because it became a work order. That work order may have been moved in the meantime by another user, or created with another employee, on another date and time.
An other possibility is that another user in Plan-IT Workshop has removed the reservation before it was changed to a work order:

When Plan-IT cannot find anything on the entered registration number, the window stays empty:

This means that Plan-IT can't find a reservation on this registration number, or the logging was turned off at the time when this reservation was made.
You can activate logging in Plan-IT. When this option is enabled, all important events are kept in the logging of Plan-IT. This way you can find back what exactly happened in the planning. And maybe even more important: by which user certain actions have been performed.
Activate logging
Follow the below steps to activate the logging:
- In the menubar, click on the option System.
- Select the option Management.
- Click with the right mouse button on the green Plan-IT bar.
- Select the option Systemsettings.
- Put a check in the box with the option Activate logging.

Because this is a global setting for all establishments in Plan-IT, you need Master rights to turn this on. (Keep in mind that after turning on this option, Plan-IT will log all actions and save them in a logging database. This can cause Plan-IT to be performing a bit slower. With a fast network speed, the difference in speed should be minimal).
When you click with the right mouse button on a work order now, the contextmenu has the extra option Logging:

Click on the Logging option to open the om het Logging window. Here you can find everything that has happened with the work order:

The logging window shows an overview of everything that has happened with the work order. This way Plan-IT will keep track of whether an appointment confirmation e-mail has been sent (and to what e-mail address) whether connections have been succesfully made, when a work order has been moved or modified, when a work order has been deleted.
Check logging of a deleted work order
To check if a work order has been deleted, open the logging of another work order and enter the work order number of the work order you are looking for in the field that is in the top of the screen, and press the <strong "="" data-redactor-tag="strong">Enter key. This way you can easily check the logging of work orders that no longer exist in Plan-IT. You can also see which user has deleted the work order:

Keep in mind that Plan-IT will only start logging from the moment that the logging option is activated. You can not view any logging from the past when the logging was not yet activated.
Since version 5.171.9700, it is possible to link the availability of replacement cars in Plan-IT Workshop to the Plan-IT Online on time module. When making an appointment, customers can then see which replacement cars are available on the selected day when selecting one.
Follow the below steps to configure this.
System settings
First modify the settings for the online module to make the replacement transport available for the online module:
- Click in the menubar on the option System.
- Select the option System settings.
- In the first row of tabs, go to Connections.
- Go to Online module in the second row of tabs.
- Put a check in the box with the option Plan-IT Vervangend Vervoer online beschikbaar stellen.
- Click on the Save button in the bottom right corner.

Replacement Car
After this, enter a code for each replacement car that you want to make available for the online module:
- Click in the menubar on the option File.
- Select the option Replacement Car.
- Select a replacement car by pressing the button in the Model field.
- Put a check in the box with the option Online beschikbaar stellen.
- In the Online type field, enter a unique code for each replacement car that you want to make available online.

- Click on the Save button to apply the changes for each replacement car.
- Click the Cancel button to close the Replacement Car window.
Online module
Next step is to enter the codes that you have entered in the Online type field with each replacement car, in the online management module as well:
- Go to the website https://www.plan-it-online.nl and login with your username and password.
- Select the correct establishment in the topleft corner.
- Click on the option Replacement car.
- Add the cars from Plan-IT Workshop that you want to make available online, by entering the names in the Description field.
- Enter the same value in the Code field that you have entered in the Online type field in Plan-IT Workshop.

The cars in Plan-IT Online are now linked to the replacement cars in Plan-IT Workshop with the identical codes.
When a customer is making an appointment and selects a day and time, the online module checks which replacement cars are still available in Plan-IT Workshop on that day. The replacement cars that already have a reservation scheduled on that day are shown in grey and cannot be selected anymore.

When a customer has sent an appointment request where a replacement car is selected, Plan-IT Online will place a reservation for the work order on the planboard like it usually does, and also a reservation for the replacement car automatically. This way the same replacement car cannot be selected on the same day by another customer.
When the database file of Plan-IT is regularly being locked or becomes corrupt we recommend to switch to a decentralized installation of Plan-IT. This means that the Data folder remains on the central location and the folders Programs, Reports and Help are moved to the clients (workstations or terminal servers).
Switch to a decentralized installation
We will assume that the Plan-IT installation is on a fileserver.
- Make sure that all users have closed Plan-IT and that all background tasks are stopped.
- Copy the folders Programs, Reports and Help to a local folder on all clients (for example: C:Program FilesPITPlan-IT).
In case the copying can not be performed succesfully, there is still a file in use, this needs to be closed first. - Go to the folder Programs and click with the right mouse button on the file Plan-It.ws and select the option Open with.

- Open the file in a text editor, for example Notepad.
- Edit the line DataPath=.Data to DataPath=\%SharenamePITPlan-ITData where %Sharename% is the location on the network.
- Edit the line Filelist=.DataFILELIST.CFG to Filelist=\%SharenamePITPlan-ITDataFILELIST.CFG where %Sharename% is the location on the network.

After this start Plan-IT once with administrator rights:
- Click with the right mouse button on the file ProgramsPlanbord.exe (or the shortcut to that file).
- Select the option Run as administrator.

Updating the decentralized Plan-IT installation
To update a decentralized installation of Plan-IT, perform the below steps:
- Perform the update according to these steps, on the server on which the Data folder is located.
- Make a back-up of the file ProgramsPlan-It.ws from one of the client installations, this needs to be put back later.
- Copy all folders except the Data folder to all clients.
- Then copy the back-up of the file ProgramsPlan-It.ws to all clients.
After all this, start Plan-IT once with administrator rights on all clients so that all dll files are being registered.
Follow the below steps when you want to configure a separate online module for the tyre change period:
Configuring the online module
First fill in the second online module to your liking. When this module will only be used as a tyre change module, only tyre change activities have to be created.
- Go to the website https://www.plan-it-online.nl and log in with your details.

- In the left column, click on the option Activities
- First, create separate groups for the activities on the bottom of this page

When you want to make the tyrechange employees available for all activities, then create 1 group that you link to all activities.
- Go to the top of the page, and create the preferred activities at Activity settings (Radiobutton).
- set the correct groups, and the correct number of AE's (labor time units), and make sure that there is a checkmark in the box for the option Visible.

Configuring the second online module in Plan-IT Workshop
- In Plan-IT Workshop, click in the menubar on the option System.
- Select the option System settings.
- In the top row of tabs, go to Connections.
- Then go to the tab Online module in the second row.
In the top section of the window that appears, the regular online module is configured.
- In the bottom section of this window, put a checkmark in the box with the option Online module 2. Enter the data of the tyre change module in the fields Log-in and Password.

Now go to the calendar of the employee that you want to make available for the tyre change activities:
- In the menubar, click on the option File.
- Select the option Calendar.
- Select the name of the preferred employee in the dropdown list in the bottom left corner of the window.

- Click with the right mouse button on the first day for which you want to configure the availability for the tyre change module.
- In the contextmenu that appears, select the option Day wizard.

- In the window that appears, enter the times for the start and end of the workday, and the break times for the employee.
- Then select how much time 1 AE / labor unit should take. Generally this is 30 minutes.

The first day is now filled in with blocks of 30 minutes labor time.

- Click with the right mouse button on the same day again and in the contextmenu, select the opition Online module.

- Put a checkmark in the box with the option Use Online module 2 and select a speciality in the Group field to make the employee available for the activities of the second online module.

- Click on the Save button to apply the group from the second online module for the selected day.
A text will appear on the day as an indication that the selected employee is available for online module 2 on that day.
Attention: there must be a group selected from the second online module to make this work.
When you activate the Use online module 2 option but you leave the group on All operations, the employee will not be available for the second online module!

- Click with the right mouse button on the day and in the contextmenu that appears, select the option Copy.

- Now click with the right mouse button on the next day and in the contextmenu that appears, select the option Paste.

- Repeat this until the entire first week is filled.

- You can now copy the entire week by clicking with the right mouse button on the week number.
- In the contextmenu that appears, select the option Copy.

- Then click with the right mouse button on another week number to paste the copied week to another week.

- When the calendars of all employees are filled in to your liking, click on the Close button in the topright corner of the window.
- A pop-up window appears with the question whether you want to send the edited working hours to the online module. Click on the Yes button.

When the feedback is finished, the employees are available for tyre change appointments.
On this page we explain what effect the different options in an Autoline work order have on work orders in Plan-IT.
Configure start time and end time
Enter in Plan-IT what the default times are that Autoline uses as starting time and end time for the workshop (usually this is 8:00 and 17:00).
Plan-IT uses these settings to determine whether you want to give a work order a customer waiting, a time appointment, or a deadline.
Further down on this page we will explain how that works.
- Click in the menubar on the option System.
- Select the option System settings.
- In the top row of tabs, go to Replacement Car.
- Then in the second row of tabs, go to Settings.
- Select the correct start time and End time in the fields Start time for replacement cars and End time replacement car.
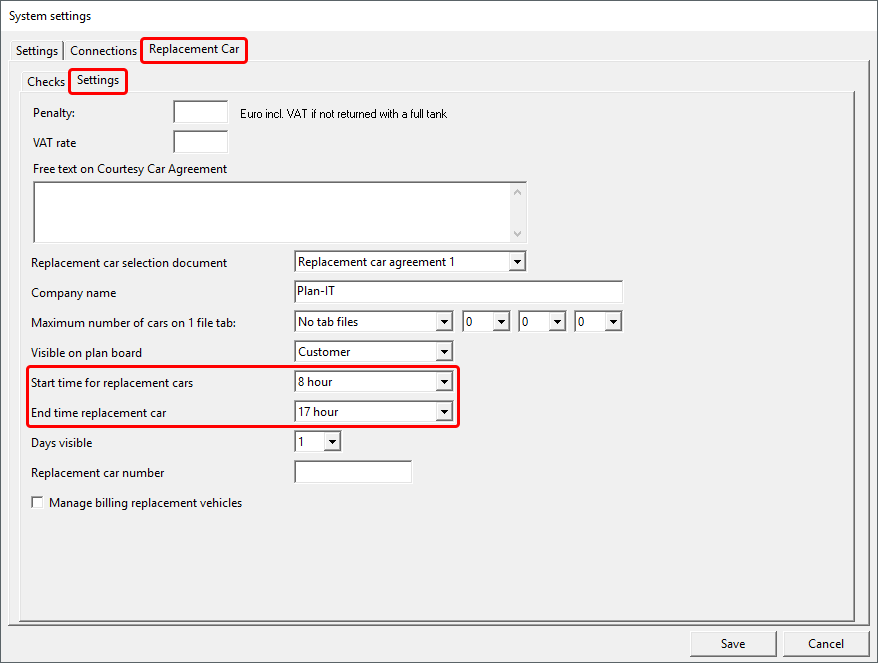
Schedule work order
- Create a work order in Autoline and click on the Save button.
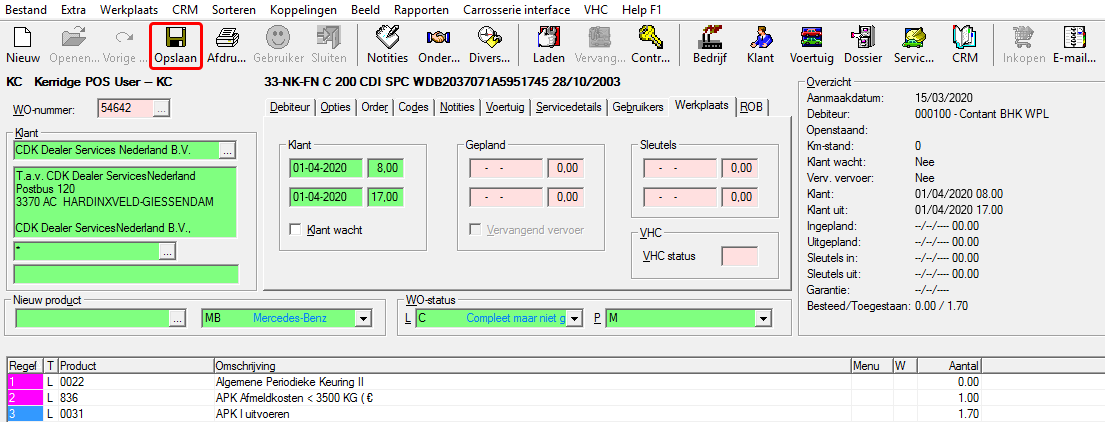
- A pop-up window appears. Click on the OK button.
The work order is now available in Plan-IT.
- In Plan-IT, click with the right mouse button on the planning board at the preferred day, time, and employee.
- In the context menu that appears, select the option New Work Order.
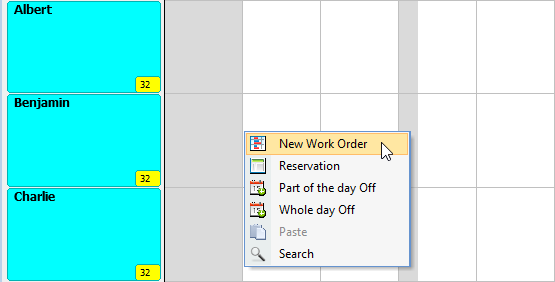
- The Work order window appears. Click in the bottom left corner on the Import button.
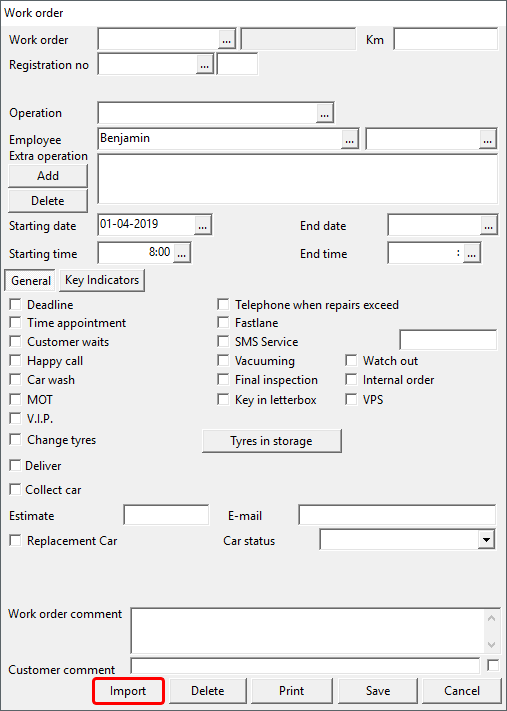
The Import window opens.
- Select the work order that you want to import.
- Then click in the bottom right on the Import button.
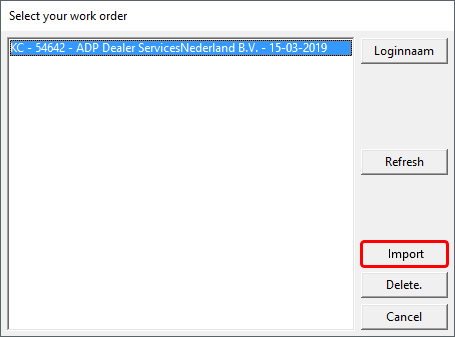
The import window disappears and the Operation window opens.
- Select the operation/color that you want to give to the work order.
- Then click on the OK button in the bottom right corner.
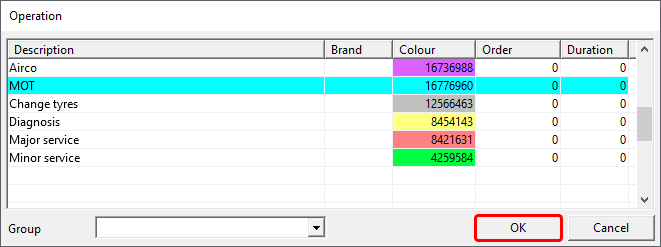
The work order window is now filled with all data from Autoline.
- Click on the Save button in the bottom right corner.
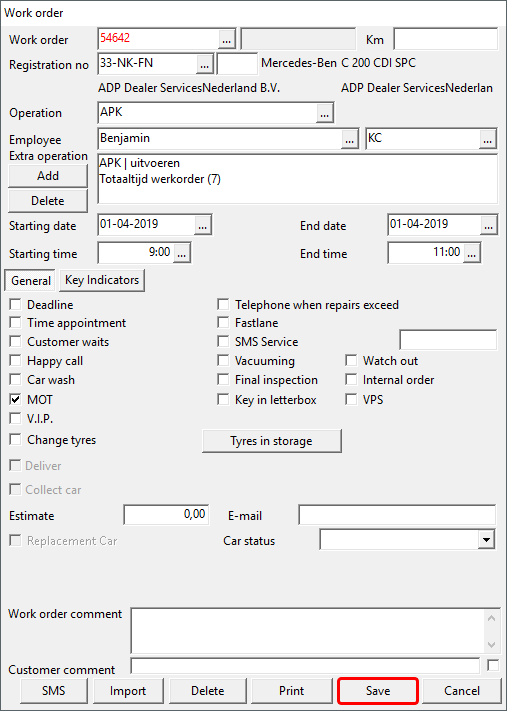
The work order is now placed on the planning board.
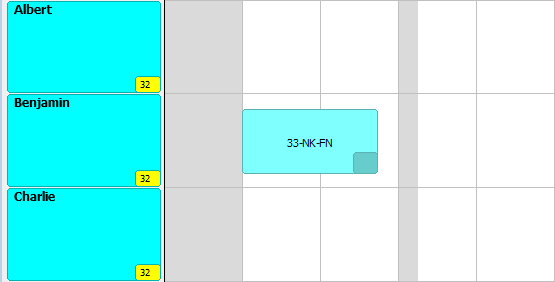
Customer waits
Follow the below steps to schedule a work order with the indication that the customer will keep waiting while the operations are being performed.
- In Autoline, put a check in the box with the option Klant wacht when creating the work order.
- Enter the expected time of arrival for the customer if you want to see it on the work order.
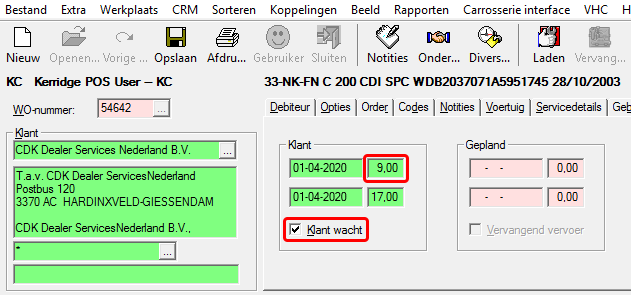
- Save the work order in Autoline.
- Import the work order in Plan-IT.
The Customer waits option is automatically taken over from Autoline, with the adjusted customer time entered as waiting time.
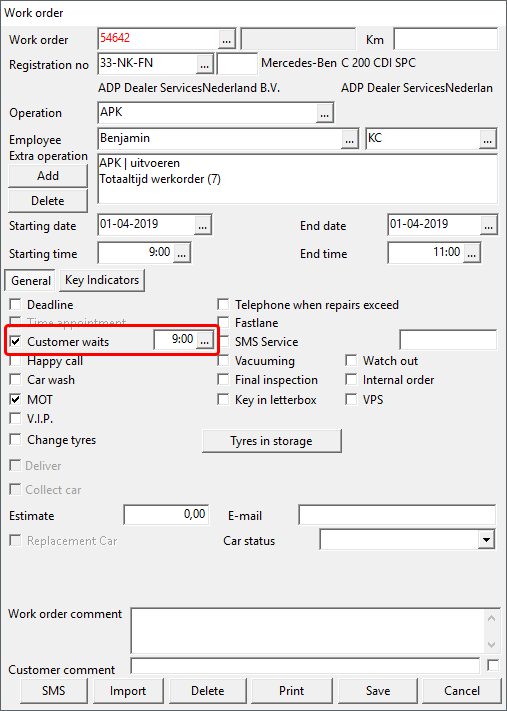
The work order shows a red border as indication that the customer wants to wait.
When an adjusted customer time is entered in Autoline, it will be shown in the topleft corner of the work order in Plan-IT as indication what time the customer is expected.
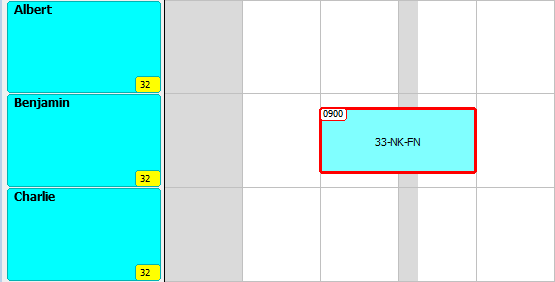
Time appointment
Follow the below steps to schedule a work order with a time appointment.
- In Autoline, enter the times that have been agreed upon with the customer.
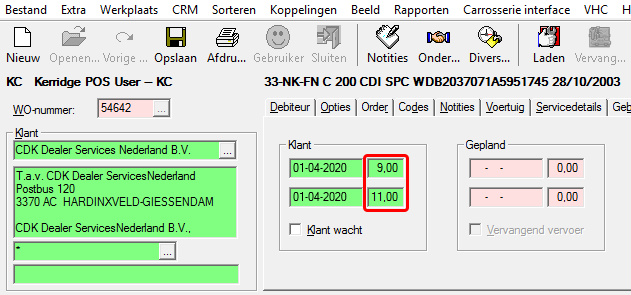
- Save the work order in Autoline.
- Import the work order in Plan-IT.
The Time appointment option is automatically taken over from Autoline, with the adjusted customer times entered.

The adjusted customer times that are entered in Autoline, are shown in the topleft and topright corner of the work order as indication what has been agreed upon with the customer.
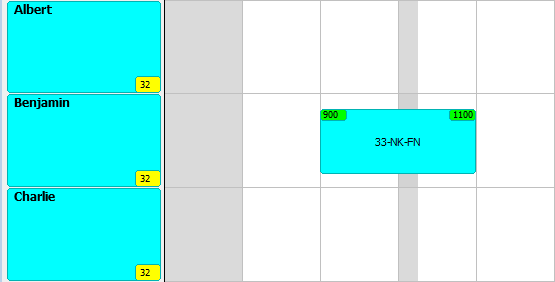
Deadline
Follow the below steps to schedule a work order with a deadline.
- Enter the time that you want to see as a deadline on the work order.
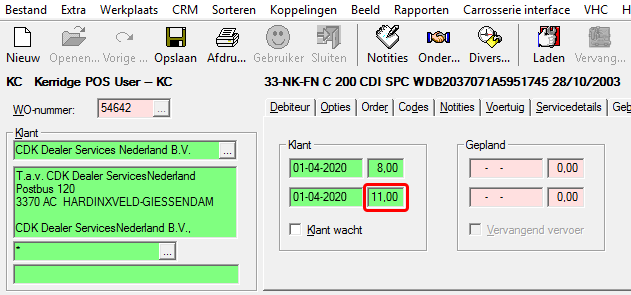
- Save the work order in Autoline.
- Import the work order in Plan-IT.
The Deadline time is automatically taken over from Autoline, with the adjusted customer time entered as deadline time.
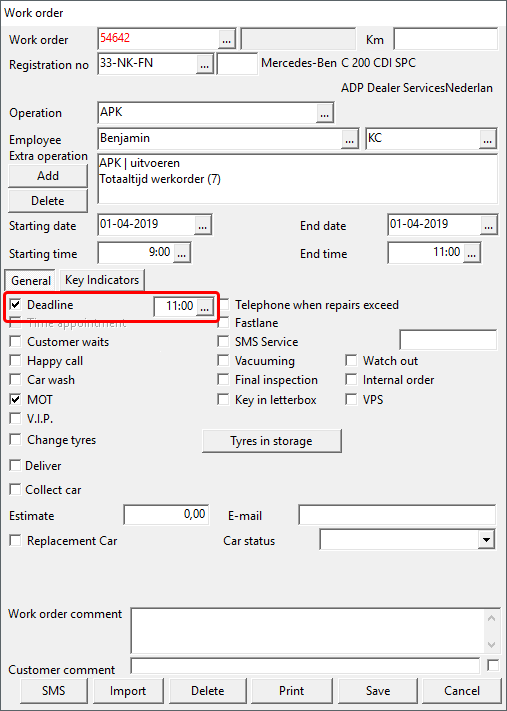
The adjusted customer time that is entered in Autoline, is shown on the work order on the planning board in the topleft and topright corners as indication when the deadline for this work order is.
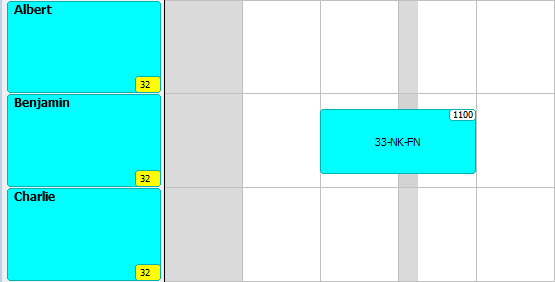
Reppacement car
Follow the below steps to schedule a work order with a replacement car.
- Put a check in the box with the Vervangend vervoer option in Autoline.
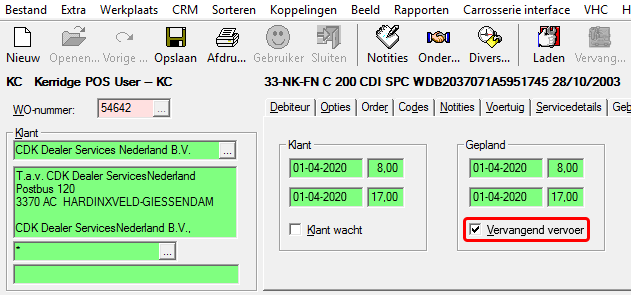
- Save the work order in Autoline.
- Import the work order in Plan-IT.
The Replacement Car option is automatically taken over from Autoline.
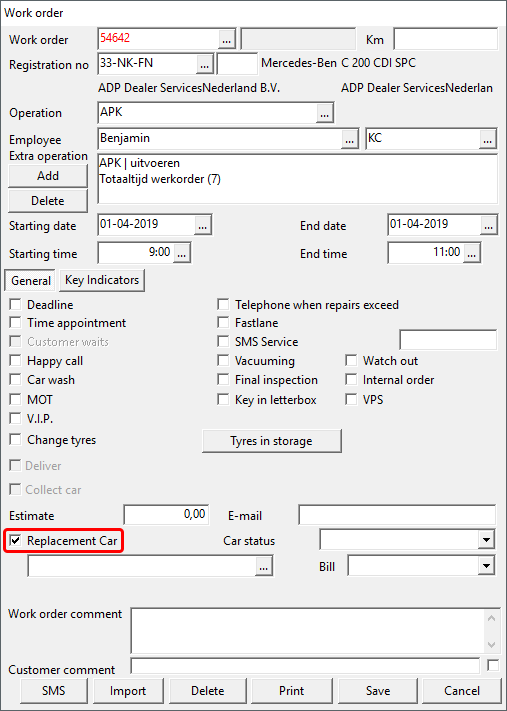
An indication that a replacement car needs to be provided to this customer appears on the work order in Plan-IT.
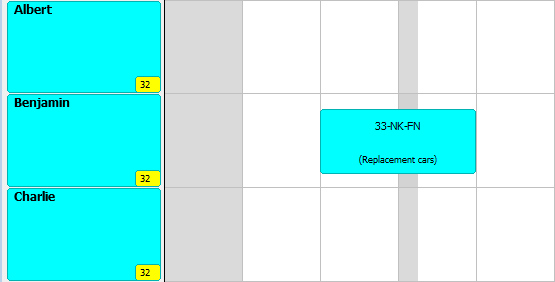
In Plan-IT Online, different layouts can be selected to change the look of the calendar. Follow the below steps to change the layout:
- Go to the website https://www.plan-it-online.com and log in with your name and password
- In the left column, click on the option Global settings
- In the Layout field, select one of the available styles
- Click on the Save button

The saved style is the applied to all your online planning calendars.
Customize Colors
By default, the Online Planner has the colors shown in the examples. It is possible to customize some of the colors.
Set the Default Style colors option to No

In the main menu, go to Settings and adjust the colors under Layout and Layout text


Examples
At the moment you can choose from the following styles:
Plan-IT Online Style 4 (Steps):


Plan-IT Online Style 5 (Steps):


Plan-IT Online Style 6 (One Page):

Plan-IT Online Style 7 (Steps):


Since version 5.171.9814, Plan-IT Workshop has a password forgotten function.
When a user has forgotten the password, they can change it temselves.
Follow the below steps to configure this.
Configure the password forgotten function
- Click in the menubar on the option System.
- Select the option Management.
- In the management window, click with the right mouse button on the green PLAN-IT bar.
- In the contextmenu, select the option Systemsettings.

- In the System window, go to the tab Forgot your password.
- Enter the mail server details. Ask your system administrator for the correct data.
- Then click on the Save button in the bottom right corner.

- In the bottom right corner, click on the User button to switch to the user section.

- In the user section, click with the right mouse button on a user for which you want to activate the password forgotten option.
- In the contextmenu click on the option Edit user.

- In the Edit user window, enter the e-mailaddress of this user in the E-mail field. Plan-IT will send a temporary password to this e-mailaddress when the user has forgotten the password.
- Then click on the Save button in the bottom right corner.

Configure for each user their own e-mailaddress this way, on which they should receive the temporary password.
The function is now configured for use.
Use the password forgotten function
When the user enters an incorrect password with their username now, a pop-up window appears to inform that the password is incorrect.

After the user has clicked on the OK button, a button Forgot your password appears in the bottom left corner of the login window.

Click on this button to request a temporary password.
A pop-up window appears with the question if Plan-IT should send a temporary password to the configued e-mailaddress.
Click on the Yes button to confirm this.

An e-mail is sent now to the configured e-mailaddress with a randomly generated temporary password.
When the user logs in now with the temporary password, a window appears in which a new password can be created.

Enter a new password and click on the Change button in the bottom right corner.
Global activities can be configured in Plan-IT Online. Global activities are activities that are present in all Plan-IT Online establishments and are identical.
Configuring global activities
- Go to the website https://www.plan-it-online.nl and log in with your details.
- In the left column, click on the activities option.
- Add a new activity or go to an existing activity that you want to configure as a global activity.
- Put a check in the Global box in the top right corner, and click on the Save button in the bottom right corner.

The activity is now active in all establishments.
When you edit the activity in 1 establishment, this change will be applied in all establishments
.
When you want to make a global activity only for a specific make, select the preferred make in the Make field in the bottom right corner.
The global activity is only visible now in establishments where the selected make is configured.
When configuring the preferred times, it is now possible to activate the Deliver time option with a preferred time. When a time, that is configured as a deliver time, is no longer available in the planning, but there is still time available later that same day, the customer can still select the deliver time. The appointment will then be scheduled on the first available moment on that day.
Configure deliver time
- Go to the website https://www.plan-it-online.nl and log in with your details.
- In the left column, click on the Settings option.
- Make sure that the Use preferred times option is set to Yes.
- In the bottom right corner, click on the Save button if you have changed this option.

- Then click in the left column on the Preferred times option.
- Add a new preferred time if needed.
- Put a check in the box for the Deliver time to make a preferred time also a deliver time.
- Finally click on the Save button in the bottom right corner.

The deliver times are now active. When a customer now selects a deliver time on a certain day, but the selected time is not available, the appointment will be scheduled on the next first available moment on that day.
When you only enter deliver times in the preferred times, Plan-IT Online will show the deliver times with the other remaining available times.
When you neter deliver times together with preferred times that are not deliver times, then both will be shown.
In the appointment confirmation that the customer will receive per e-mail, the time selected by the customer is shown:
| Dear customer, Via the online planboard on the website of [company name], you have made a request for making a workshop appointment. You will receive a confirmation as soon as possible in which we will indicate whether the appointment is scheduled. You have entered the following detais: |
|
| Appointment request | |
| Establishment: | [company name] |
| Appointment request: |
02-04-2019 10:00 |
| Activities | |
| MOT check | |
In the appointment confirmation that is sent to the dealer per e-mail, the deliver time that the customer has selected is shown, as well as the time on which the appointment request (the reservation) is scheduled:
| The applicant has entered the following details: |
|
| Appointment request | |
| Establishment: | [company name] |
| Appointment request: | 02-04-2019 10:00 |
| Scheduled time: |
14:00 |
| Activities | |
| MOT check | |
Since Plan-IT Workshop version 5.171.9879 it is possible to configure Microsoft Office 365as mailserver in Plan-IT Workshop.
Follow the below steps to configure Microsoft Office 365 as mailserver:
- Click in the menubar on the option System.
- Select the option System settings.
- In the top row of tabs, go to Connections.
- Go in the second row of tabs to Mail.
- In the field Mail server enter: smtp.office365.com.
- Below that, in the field Port, enter: 587.
- In the field Security, select: TLS.
- Then enter the correct details of your Microsoft Office 365 account in the Log-in and Password fields in the right part of this window.
- Make sure that the same e-mailaddress that is entered in the Log-in field is also entered in the Sender e-mail field.
- Finally, enter your company name that the customer will see as sender in the Sendername field.

When you want to copy a work order or part of a work order to another date, and leave the original work order, then use the options Copy or Divide for that. Both options are explaind in further detail on this page.
Copying work orders
Follow the below steps to place a copy of a work order on another date, while the original work order remains unchanged:
- Click with the right mouse button on the preferred work order.
- In the context menu that appears, select the option Copy.

The work order is now copied to the memory of the computer.
- With the buttons under the planboard, navigate to the preferred day where the copied work order should be placed.
- Click with the right mouse button on the planboard with the preferred date, time, and mechanic where the work order copy should be placed.
- In the context menu that appears, select the Paste option.

Plan-IT creates a copy of the original work order on the new spot. The copied work order now gets a new work order number, with a reference to the original work order. The copied work order has the same operations, extra operations, and checkmarks as the original work order. Editing these options in the copied work order has no effect on the original work order.
Dividing work orders
When dividing work orders, Plan-IT Workshop splits a work order in two separate work orders, with the original time duration of the work order being divided between the two new work orders. This way, you can move part of an existing work order to another date, time, or mechanic.
- Click with the right mouse button on the preferred work order.
- In the context menu that appears, select the Divide option.

A pop-up window with a slider bar appears now, with which you can indicate how you want to divide the work order. By moving the slider to the left or right, you can indicate in percentages how the time duration of the work order should be divided between the two new work orders.

After you have set the percentage, click on the Divide button. The work order is split by the chosen percentage, rounded off to quarters of an hour.

The copy work order (indicated by the yellow dot in the bottom right corner) can now be moved to another date, time, or mechanic by dragging, cutting and pasting it, or by temporarily placing the work order on the clipboard and then navigating to the preferred date.
To be able to easily see if there are specifics with a work order, Plan-IT has visual properties.
Because Plan-IT has a huge number of options, this page provides an overview of all the work order properties in Plan-IT Workshop.
Reservation, work order, or day off?
First of all, there are a number of properties that allow you to distinguish work orders, reservations, and days off from each other:

- A reservation has a lighter colored, thicker border. In the bottom left corner is the name of the Plan-IT user that has created the reservation (from version 5.171.9700).
- A work order has a darker colored, thinner border. The color of work orders is determined by the color of the main operation that is selected in the work order.
- A day off is taller than a work order. Days off all have the same color, that is configured in the system settings.
Wok order properties
To be able to easily see if there are specifics with a work order, Plan-IT has visual properties. Some of them are always active, but other properties are turned off by default and can be turned on if preferred.
This page has an overview of all properties in Plan-IT Workshop.
Registration number, customer name, or both
In the system settings can be configured whether work orders should only show the registration number, the customer name, or both.

Deadline
Put a check in the box with this option if a deadline has been agreed with the customer when the work on the vehicle must be finished.
This is shown on the planboard as a white triangle in the top right corner.
When you also enter the agreed time in the field with the deadline option, this time will be shown in the top right corner.

Time appointment
Put a check in the box with this option if a delivery and collection time has been agreed with the customer.
This is shown on the planboard as a white triangle in the top left and right corners.
When you also enter the agreed delivery and collection times in the fields with the time appointment option, these times will be shown in the top left and right corners.

Customer waits
Put a check in the box with this option if the customer wants to wait until the work on the vehicle is finished.
This is shown on the planboard as a white triangle in the top left corner.
When you also enter a time time in the field with the deadline option, this time will be shown in the top left corner.
Besides that, ithere is also a system setting to give work orders in which the customer waits option is checked a red border.

MOT
Put a check in the box with this option if an MOT check needs to be performed.
With a system setting, it is possible to give work orders with the MOT option checked a square in the bottom right corner.

Watch out
With the watch out option in work orders, Plan-IT users can make specific work orders stand out. What this option is used for can be mutually decided in a company.
Work orders with the Watch out option checked on will be shown shaded.

Lock
In Plan-IT Workshop, work orders can be locked to prevent Plan-IT users from editing, deleting or moving it.
With a system setting, it is possible to give work orders that are locked a black dot in the bottom right corner.

Copy
A copied werkorder can be shown via a system setting with a yellow dot in the bottom right corner.

Comment
Work orders can have comments added.
To make work orders with comments stand out extra, the work orders can be shown on the planboard via a system setting with a red dot in the bottom right corner.

Please note: This only applies to the Work order comment, not the customer comment.
Deliver & Collect
With the deliver & collect options, you can indicate in a work order that the customer needs to be delivered back after bringing the car and picked up when the work on the car is finished, or that the company picks up the car and delivers it back afterwards.
This is indicated on the planboard by yellow triangles in the top left and right corners.
When you also enter a start and end time in the fields with the deliver and collect options, those times will be shown in the top corners, with an indication whether it's for colecting and delivering the car or the customer.

Replacement car
With the replacement car option, you can indicate in a work order that a car is reserved for the customer.
With a system setting, the replacement car can be made visible on the work order, below the customer name.

Properties as icons
Since Plan-IT Workshop version 6.171.1014 the most important properties can also be shown as icons on work orders.
With these icons, it is easier to see what the property is than with colored dots for example:
| Watch out option activated | locked work order | copied work order |
 |
 |
 |
| work order with comment | MOT option activated | Change tyres option activated |
 |
 |
 |
A combination of these options can also be checked, the icons will then appear next to each other on the work order.

Holidays can be configured in the Plan-IT Online workshop planner. These days will then be shown as not available in all establishments.
When an establishment might forget to configure the holidays manually in the calendar of Plan-IT Workshop, this way you can prevent that customers can still schedule appointment requests on those days.
Configure holidays
Follow the below steps to configure holidays:
- Go to the webpage https://www.plan-it-online.nl and log in with your username and password.
- Click in the left column on the option Holidays.
- In the field Name, enter a description for the holiday.
- Select the preferred day, month, and year in the fields with the option Date.
- When everything is entered properly, click on the Save button.
For holidays with a fixed date (for example new year's day or the christmas days) the year can be left blank. These holidays withh the return each year.

The Plan-IT Online management environment has received an update.
The following options can now be configured for each activity:

| Order: | Enter a number for each activity. All activities will be sorted in this order. |
| Description: | Enter a name for the activity here. |
| Visible: | Put a check in this box to make the activity visible. When you want to hide an activity temporarily, you can uncheck this option. The activity can be quickly made visible again later. |
| Waits: | Put a check in this box to make this activity only plannable on the configured waiting times. This option is only available for the checkbox activities, and not for radiobutton activities. |
| No Saturday: | Put a check in this box to block this activity from being plannable on Saturdays. |
| Global: | Put a check in this box to make this activity visible in all establishments, instead of only in the current establishment. Changes that are made to a global activity are done in all establishments at the same time. |
| Group: | Select a group for the activity. With these groups you can determine In Plan-IT Workshop which mechanics are available for which activities. |
| Extra groups: | You can configure extra groups here. A mechanic is only available for an activity when he is available for all configured groups. |
| Number of units: | Enter here how many blocks in the calendar of the mechanic in Plan-IT Workshop should be reserved for this activity. |
| Visible from/till: | A start and end date can be configured here, from when until when this activity should be visible for customers. You can also enter a date without a year, to configure a recurring period. |
| Plannable from/till: | A start and end date can be configured here, from when until when this activity should be plannable by customers. You can also enter a date without a year, to configure a recurring period. |
| Mileage from/till: | A mileage range can be entered here. This activity will then only be shown when the mileage that the customer enters falls within this range. When a customer has entered a mileage that falls outside this configured range, the activity will be hidden. |
| Price: | A price can be entered here that will be shown behind this actirity. |
| from: | Put a check in this box to show the configured price as a from-price. |
| Discount price: | A discount price can be entered along with a price. Behind the activity will be shown "From |
| from: | Put a check in this box to show the configured Discount price as a from-price. |
| Code: | An extra attribute can be entered here. a web developer can use this to trigger extra actions from the API, that affect all activities with the same code. |
| Label: | An extra attribute can be entered here. a web developer can use this to trigger extra actions from the API, that affect all activities with the same label. |
| Duration: | Enter how many minutes the activity consumes, which can also be used to trigger actions from the API. |
| ExtraInfo: | You can enter extra information for the activity here. An i will be shown behind the activity then that customers can click to read the extra information. |
| Day unavailable: | Enter how many days this activity should be blocked from being planned, counted from the current day. |
| Make: | You can select a make for the activity here. When the activity is configured as a global activity, it will only be shown in establishments for this make. |
Click on the Save button to keep all entered details.
The several work order statuses of Autoline are automatically processed and showed in Plan-IT Workshop.
Zie hieronder een overzicht van alle statussen:
Wanneer de werkorder in Autoline door de Service Adviseur wordt omgezet naar Sleutels ingenomen, wordt in Plan-IT Werkplaats de status gewijzigd naar Aanwezig:

Wanneer de monteur in Autoline op de werkorder heeft ingeklokt, wijzigt de status van de werkorder in Plan-IT Werkplaats naar Bezig:

Wanneer de monteur in Autoline heeft uitgeklokt op meerwerk, wijzigt de status van de werkorder in Plan-IT Werkplaats naar Onderbroken:

Wanneer de monteur in Autoline heeft uitgeklokt op werk voltooid, wijzigt de status van de werkorder in Plan-IT Werkplaats naar Monteur klaar:

Wanneer de werkorder in Autoline door de Service Adviseur wordt omgezet naar Sleutels uitgegeven, wordt in Plan-IT Werkplaats de status gewijzigd naar Opgehaald:

De status Klaar wordt niet automatisch vanuit Autoline verwerkt, dit zal dus handmatig op de werkorder in Plan-IT Werkplaats gewijzigd moeten worden.
Klik hiervoor met de rechtermuisknop op de werkorder in Plan-IT Werkplaats, en selecteer in het contextmenu dat verschijnt de optie Klaar:


It is possible to have the Plan-IT Online on Time module take into account the percentage active in count that is configured with the employees in Plan-IT Workshop (since version 6.171.1928).
Configure
Follow these steps to activate this:
- Go to https://www.plan-it-online.nl and log in with your details
- Select the preferred establishment in the topleft corner where you want to activate this
- Click on the option Settings in the left menu
- Change the option Use percentage capacity technician to Yes and clock on the Save button in the bottom right corner

The online workshop scheduler for this establishment will noe keep into account the percentage active in count that is configured for each technician in Plan-IT Workshop.
Plan-IT Online calculates the capacity over the total number of blocks in the calendar of the technician. So when a technician has 8 blocks of an hour for instance, with a percentage of 50%, the online module will consider this technician as full when 4 or more of these blocks are occupied.
Plan-IT Workshop settings
Follow these steps to change the percentage active in count for a technician in Plan-IT Workshop:
- Click with the right mouse button on the technician for which you want to view or edit the percentage active in the count, and select the option Employee

The option Employee is only visible when your Plan-IT Workshop user account has Administrator or Master rights.
Contact your Plan-IT Workshop administrator when you don't see the option Employee in this menu.
- In the Employee window, change the number in the field with the option Percentage active in count (0 - 100)

- Also check if the selected employee is not set to Do not plan online with the Group option in the bottom right corner
- Click on the Save button in the bottom right corner when all setings are checked and properly configured
- In the top right corner of the Employee window, click on the button in the field with the Name option to select another employee, in case you want to view or edit the percentage of other technicians
- When you have checked all technicians, click on the Cancel button in the bottom right corner to close the Employee window
Plan-IT Workshop will now ask in a pop-up window if you want to send the changes to the online module.
Click on the Yes button when you have made changes to the settings, to send the new settings to the online module.


